Telegram Rolls Out One-on-One Video Calls For Android and iOS Users

Telegram will also be launching group video calls in the coming months.

Telegram now allows users to conduct one-on-one video calls on both Android and iOS platforms. The company announced the feature on its seventh anniversary on August 14, saying that this year had highlighted the need for face-to-face communication. Available in its alpha version, the video calls are protected with end-to-end encryption that users can confirm by checking if emojis shown on their partner's screen and their own are matching. Telegram also confirmed that it would be launching group video calls in the coming months.

Telegram Rolls Out One-on-One Video Calls For Android and iOS Users

Telegram said in a blog post that the video calls would support picture-in-picture mode, that means users can scroll through chats on Telegram and multitask while on call. They can also switch off the video and switch to normal call whenever they wish.

App users can start a video call by clicking on the call button on the contact's profile page. To confirm end-to-end encryption, users can check if the four emojis visible on-screen for them and their chat partner's match. If yes, the call is fully secured, according to Telegram.

Telegram also unveiled a batch of animated versions of commonly used emojis for all users to mark its seven-year anniversary. A larger animated version of the emoji will appear when used in a chat.


In its blog post, Telegram said that although it had begun as a small app focused on secure messaging in 2013, it had now grown into a platform that has over 400 million users, and is now one of the top 10 most-downloaded apps. Introducing the video call feature puts Telegram a step closer to its competitors like WhatsApp and Viber, and the upcoming group video call feature will enhance the same.

The company said that their Android and iOS apps have reproducible builds. Anyone could verify encryption and confirm that Telegram uses the same open source code that is published with each update. Besides group video calls that are expected to be rolled out soon, Telegram also said that there would be more features and improvements in future versions of the app.

Telegram had earlier indicated in April that it would be introducing secure video call features for the app soon, and had started rolling out the feature in beta mode a few days ago, as per reports.

How to check accidentally cleared notifications on Android phones

We always accidentally clear notifications from Android Mobiles. The "Notification History Log" app is a great app, which will offer you more details than the stock Notification Log option.

In the past, you might have accidentally dismissed all the notifications on your Android phone, which you know is a bit frustrating. Notifications are an essential part of the phone, and even keeps people hooked to the device. If you have received an important message from someone or an alert from any app, you won’t know about it immediately. You must be thinking it will take only a few minutes to check all the apps and see if there is anything important.

Yes, I agree. But, what if you don’t need to do that as there is a way to view the history of notifications on your Android phone. The only thing is this feature is not directly accessible on Android 10. Thankfully, Google will make it much easier for you to check notifications history with Android 11. The “Notification history” feature was spotted in the second developer preview, and it shows a list of all what notifications you’ve recently dismissed.


Alternative to stock Notification Log option

Currently, you can find every missed message or update in the Notification Log widget. But, if you can’t find this feature on your phone, you can download the “Notification History Log” app from Google Play Store. This is a great app, which will offer you more details than the stock Notification Log option. It will let you check full messages of apps like Twitter, WhatsApp, and others.

ou don’t even need to close this app as it gives you the option to open that particular app (the messages of which you were reading). The popular dark theme option is also available here. There are some more features like blacklist apps, store unlimited notifications, and advanced filters. But for this, you will have to buy the Pro version. If you don’t want to use a third-party app, then here’s how you can recover accidentally deleted notifications using the stock widget option.

How to check accidentally cleared notifications on Android phones?

How to check accidentally cleared notifications on Android phones

Step#01: Just long-press anywhere on your home screen, and tap on “Widgets.”

Step#02: You then need to scroll down and find “Settings” widget. Long-press it, and place it on your home screen. Tap on “Notification Log” to create a shortcut of it.

Step#03: Tap the widget and scroll through your recently dismissed notifications.

How to check all the deleted messages in WhatsApp

WhatsRemoved+ App , a third party App which lets you read all the deleted WhatsApp messages. 

WhatsApp introduced the “Delete for Everyone” feature a long time back. But, this is was one of the biggest and useful ones from the Facebook-owned company. Initially, WhatsApp said that you are only allowed to delete any message within seven minutes. The messaging app later increased the time limit to offer a better experience. So, if you have sent a message to anyone, WhatsApp will not give you the “Delete for Everyone” option after about an hour.

WhatsApp messages are end-to-end encrypted, and the company says that chats are deleted from its server end as soon as the sender deletes them. It even says that recipients might see your message before it’s deleted or if deletion wasn’t successful. Yes, this is true. There are times when you have read the message in the notification panel and later on you see “message was deleted” label, which is sometimes funny.

Whenever a message is deleted on WhatsApp, you get notified in the app that it was deleted, which completely ruins the purpose of the feature. After deleting something, the person will likely ask you what was it that you deleted and then you have to explain. If you delete messages on Telegram, you won’t even know that a friend of yours might have messaged you. 


Telegram doesn’t even pull up that particular chat on the top, which is great. So, in case you miss deleted WhatsApp messages even in the notification panel, then there is a way of how you can check it. There is a third-party app called WhatsRemoved+ app, which lets you read all the deleted messages. You will find this app on Google Play Store, which shows this app has been downloaded by more than five million people. Read on to know more about how to check deleted WhatsApp messages on Android phones.

How to check deleted messages on WhatsApp?


How to check all the deleted messages in WhatsApp

Step#01: Open WhatsRemoved+ app and complete the setup process by giving it permissions.

Step#02: It will then also ask you to choose apps for which you want to get notifications and detect changes. You need to select WhatsApp and move ahead.

Step#03: You will also be asked if you want to save deleted files, which is completely your call. You are done and now, you will witness all the deleted messages in the WhatsRemoved+ app. 

Follow the above mentioned simple steps and read all deleted messages from WhatsApp.

How to Merge PDF Files on Computer, Phone

 There are a bunch of methods that let you combine PDF files. After all, merging PDF files solves quite a few problems, one of them being the ability to share multiple PDF documents in one. This way you don't have to open the files one by one, then close and repeat. In this article, we'll show you how to merge PDF files on your computer and smartphone.

How to Merge PDF Files on Computer, Phone

Merge PDF online


The first method we are suggesting doesn't require you to install any third-party app on your device. This method is absolutely free and it works online for all major platforms, i.e. Windows 10, macOS, Android and iOS. Now, follow these steps.


  1. On your computer or smartphone, visit ilovepdf.com and select the first option, Merge PDF.
  2. On the next page, you'll be asked to select the PDF files you'd want to merge, go ahead.
  3. After selecting your files, select Choose > hit Merge PDF.
  4. On the next page, you'll get a prompt that your files have been merged. Hit Download Merged PDF to go ahead.

Merge PDF on Android


If you're an Android user, you'll be glad to know that there are many apps on the Google Play that let you merge PDF files for free. We tried PDFelement and found it to be among the best. Follow these steps to merge PDF files on your Android phone.

  1. Go to Google Play and download and install PDFelement by Wondershare. After the app is installed, open it and the first thing you'll need to do is configure it.
  2. Tap on Configure > Allow access to the Downloads folder. This will set this folder as an authorized path.
  3. Go back to the main menu and tap the hamburger icon in the top left. Next, tap Merge documents > tap the + icon that you see up top > hit Authorized path.
  4. Select the PDF files you wish to merge. Repeat the process by tapping the + icon and selecting multiple files.
  5. Once you're done selecting, tap the merge button in the bottom right corner to start the process.
  6. After the merging is done successfully, tap save > tap authorized path > edit the name at the bottom and hit Create.
  7. Your file will then be saved on your phone.

Merge PDF on Mac

By far, this is one of the easiest methods that let you merge PDF files. If you own a Mac, follow these steps.

  1. Go to Finder and open the folder where your PDF files are saved.
  2. After that, select the PDF files that you wish to merge > right-click > click Quick Actions > and select Create PDF.
  3. This will create your merged PDF file.

Merge PDF on iPhone, iPad


Similar to Mac, there's a native way on your iOS device to merge PDF files. This one's also pretty easy and straightforward. Here's how to do it.

  1. Open the Files app on your iOS device and locate the PDF files you want to merge.
  2. Tap Select at the top > mark the PDF files > tap the three-dots icon in the bottom-right corner > tap Create PDF. That's it.

These were some of the easy methods that let you easily merge PDF files on your computer and smartphone for free.

How to create virtual visiting cards on Google Search

Google has introduced a new search feature called people cards in India. People cards are sort of virtual visiting cards for those who are looking to improve their online visibility or those who just have started a new business and want to highlight their existing website, social media profiles, etc. People cards are currently available only on mobile in English language only.

The new feature is a part of Google Search and it appears as a part of search results when someone tries to search for someone or a business on Google. People cards contain details like name, profession, location and more. The Search also shows multiple cards in case there are multiple cards with the same name to help users distinguish between the different individuals to find who they are looking for.


However, if this feature sounds interesting to you and want to give it a try, keep reading.

Pre-requisites:
Latest version of Google app

Working internet connectivity


Steps to create People cards on Google Search

1. Open Google App on your smartphone and log in to your Google Account

2. Now, search for ‘Add me to search’ and tap on the Get Started button on the first card that says ‘Add yourself to Google Search’.


3. Choose an account with which you want to link your card


4. At the next page, enter all the details such as name, location, about, occupation, work details, educational details and whatever other important information you want to add to the card.


5.Once done, tap on the Preview button and then submit the card.


Once the card has been approved by Google, it will start appearing under the Google Search when you will search the name of your card.

How to create new Messenger Room using WhatsApp Web

Facebook has finally added Messenger Rooms support to the web and desktop version of WhatsApp, Facebook was expected to integrate Messenger Rooms, the video conferencing feature of Messenger that allows users to chat with up to 50 people in a single video call, to WhatsApp and after rolling out the feature for Messenger app and Instagram, it’s finally here.

How to create new Messenger Room using WhatsApp Web


The Rooms integration now allows WhatsApp users to create a new Room, join an invite right from the WhatsApp Web and WhatsApp for desktop.


Here’s our complete guide on how to setup, create and join a Rooms video conferencing.


Pre-requisites:


  • Make sure to update your WhatsApp app on your smartphone to its latest version
  • Working internet account
  • Facebook login credentials


Steps to create and share a room link

Step#01:Open WhatsApp Web on desktop and login by scanning the QR code

Step#02:Click on the three-horizontal dots and choose Create a room option
Alternatively, you can also open a group chat ->Attach icon ->Rooms

Step#03: Click Continue in Messenger on the popup. This will redirect you to the Messenger website in your browser.

Step#04:Login using Facebook login credentials. If asked, click on Try it button

Step#05:Then, click on Create Room as (name) button

Step#06: Click on Copy button, next to the room link field
Step#07:Now, share the link on the group or with anyone you want to add into the Room you’ve created.
Note that you can also click on the See call participants button and lock the room to prevent new people from joining.


Steps to join a Room shared on WhatsApp

To join a Room, open the chat window or group chat and click on the link shared. Click on Continue on Messenger when asked. It will then redirect you to the Rooms website, login using Facebook login credentials to join.

How to share more than 100MB files on WhatsApp

The only way to send large files on WhatsApp is by uploading them on Google Drive and then sharing on the messaging app.

Telegram just recently released an update, which allows you to send files up to 2GB. WhatsApp, on the other hand, only lets you share up to 100MB files. So, if a user wants to send a very large file or a video, they have to be dependent on Dropbox or WeTransfer. Earlier Telegram used to offer support for up to 1.5GB files, and increasing the size will be great a news for many users.


How to share more than 100MB files on WhatsApp


But, what if you are not a Telegram user and don’t want to download the app for this reason. If you are a WhatsApp user and sometimes feel like the messaging app should have offered file sharing limit more than 100MB, then here’s what you can do. There is a cloud storage solution like Google Drive. It lets you upload files up to 50GB in size for free of cost. Google even offers you 100GB space for Rs 130 per month, which is a great offer as you will not find a storage device to save 20GB for less than Rs 150.

So, you can use Google Drive to share big files on the messaging app. Currently, WhatsApp lets you send videos with 16MB limit in size and regular files up to 100MB. You cannot send any file or video for more than the mentioned size. The only way to send large files on WhatsApp is by uploading them on Google Drive and then sharing on the messaging app. There are a few simple steps, which you need to follow.


Step 1: Open Google Drive, tap on the “+” icon, which is located on the bottom right corner of the screen.

Step 2: Tap on Upload File and select it. Once the file is uploaded, you will see the file on the top of the app.

Step 3: You now need to tap on the three-dotted button and select ‘Copy the link.’ This way the file will be copied to your smartphone’s clipboard. Now, Open WhatsApp, paste the link, and press the share button.

How to Convert Image to PDF for Free

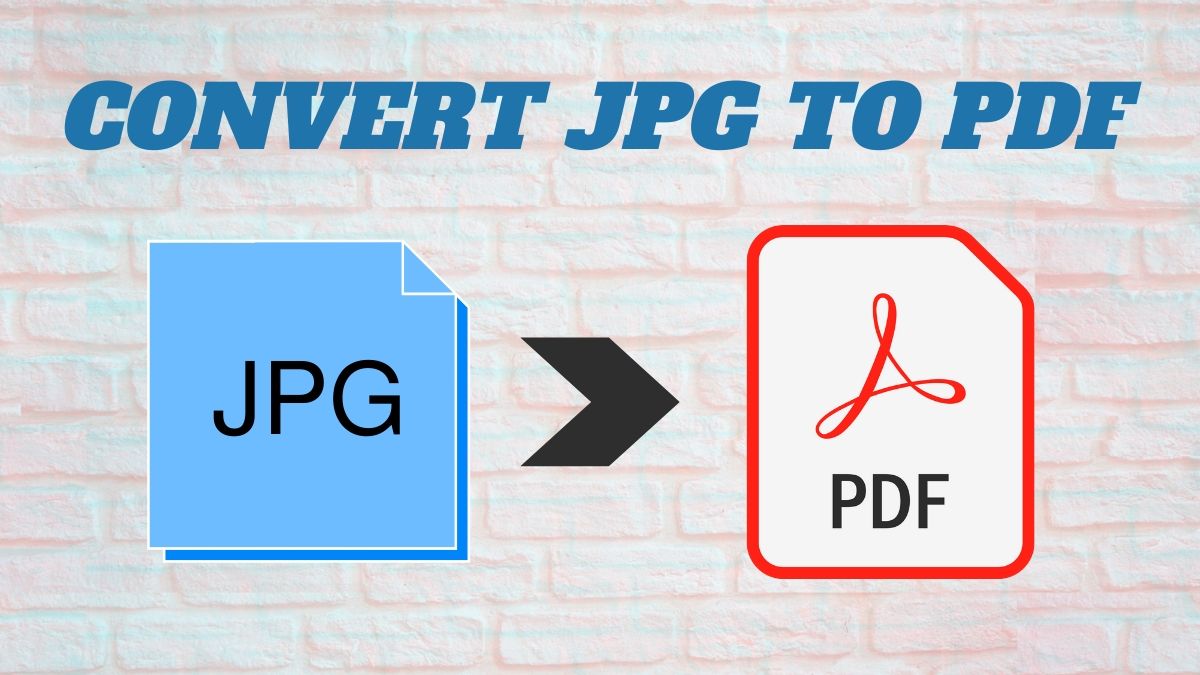
If you convert JPG to PDF, you get two benefits — you can compress the PDF file, hence achieving a smaller file size than JPG and in doing so, the original quality of the file in PDF format will still be preserved, which is not the case with JPG. Besides, you might want to convert image files to PDFs because many scanned pages are often saved in JPG format, which is not geared towards reading. Stick to this guide as we tell you methods that let you convert JPG to PDF.

How to Convert Image to PDF for Free

Convert JPG to PDF via a Website

The first method lets you convert JPG files into PDFs online. The best part is that it works the same on all major platforms including Windows 10, macOS, Android and iOS. Follow these steps.

  • Go to hipdf.com and select Image to PDF.
  • On the next screen, select JPG to PDF.
  • Next, select Choose File and then select the file that you want to convert.
  • Wait for the file to upload. Once uploaded, hit Convert. After the conversion is done, hit Download.

Convert JPG to PDF on your computer offline

If you want to convert JPG files to PDFs on your computers specifically, this method will let you do so on your Mac or Windows without having the need to install a third-party app. Follow these steps.

  1. If you're using a Mac computer, open the JPG file in Preview.
  2. Next, click on File > from the drop-down menu, select Export as PDF. Now, edit the name and remove the jpg extension > hit save.
  3. If you use Windows 10, open the JPG file and give the Print command i.e. Ctrl + P.
  4. In the Printer Settings, select Microsoft Print to PDF. Check the photo size and fit you want for the PDF > click Print.
  5. On the next page, enter the file name > select the location where you'll like to save the file > hit save
Convert JPG to PDF on your iPhone

  1. Download Photos PDF: Scanner Converter from the App Store.
  2. Open the app and tap the camera roll.
  3. Now, select the image that you'd like to convert > tap Select. After the image is processed, hit Create PDF.
  4. On the next page, enter the name of the PDF file. Set the orientation and margins if you want. Once set, hit Create PDF.
  5. After the PDF document is created, select it > tap Share > select Save to Files.
  6. Your converted file will now be saved in the Files app on your iOS device.


Convert JPG to PDF on your Android

  1. Download Image to Image to PDF Converter by DLM Infosoft from Google Play.
  2. Once the app is installed, open it > from the main screen, tap the + icon at the bottom > select the JPG file that you want to convert.
  3. After making your selection, tap the PDF icon on the top-right > enter the PDF details > tap OK.
  4. Your new PDF file will be saved on the phone. While this app does have annoying ads, it does its job perfectly fine.

By following these simple methods, you should be able to easily convert any JPG file to PDF documents in no time.

How to watch YouTube videos together with your friends remotely

The recent events have changed almost everything and social distancing has become the new normal today. Although video conferencing and texting apps have done a decent job at reducing that distance, there are a few things that we still miss doing together with our friends and family. One of which is watching the latest videos with your friends on YouTube.

How to watch YouTube videos together with your friends remotely


What if you can save a YouTube video on your smartphone and listen to it whenever you want without the need of an internet connection? This is where YouTube’s Download feature comes in handy.

Let’s see how to get going with the app and start watching YouTube videos together. 


Setting up the Airtime app

  • Open Airtime App on your smartphone and tab on "Get Started" button
  • Enter your phone number for registration and verify it using OTP received.
  • Tap on "Create Room" and add other users to room once phone number is verified by using OTP.
  • Tap on "YouTube" and start watching together with friends!

              Airtime currently supports up to 5 people in a room.

How to start watching
 
To start watching, you’ll need to send an alert to all the participants of the room asking to start a normal video call. To do that, open the room and tap on the Hand icon. Once people have joined, select the video you want to watch together by tapping on the Popcorn icon. Once selected, tap on the Post to Room button to start watching.

How to listen WhatsApp Voice Notes discreetly via your phone's earpiece

If you frequently use WhatsApp voice notes but don't like letting everyone around you in on the audio you're listening to, read out how to listen to voice notes discreetly.


How to listen WhatsApp Voice Notes discreetly via your phone's earpiece

WhatsApp voice notes are great for quick communication. At the press of a button, you can quickly switch from typing text messages to using your voice to send messages. This especially helps when you want to get a point across quickly, or in a manner requiring more detail or emotion that the plain text messages simply cannot offer. 

However, having someone close to you send you a voice note when out in public can be pretty anxiety-inducing. This especially comes into effect when you don’t have a pair of headphones connected. The WhatsApp voice note you just received maybe something personal that you don’t want everyone around you in the subway. Or it may be something downright embarrassing you’d rather keep to yourself. 

During such situation, most people either ignore the WhatsApp voice note or scramble to find the closest earphones they can get their hands on. However, WhatsApp offers a neat little feature to get past this situation pretty easily and very conveniently. The best part is you can listen to WhatsApp voice notes discreetly without requiring an external audio device like your earphones or headphones. This feature uses the earpiece that is already there on your phone.

Here are the steps...

Step 1: Open WhatsApp

Open up WhatsApp on your phone and open the chatbox where the voice note that you want to listen.

Step 2: Tap play and place the phone on your ear

Hit play on the voice note and immediately place your phone on your ear as if you were on a call. Assuming the proximity sensor on your smartphone is working fine, WhatsApp will detect that you have held the phone up against your ear and instead of playing the audio on the phone’s speaker, it will play only on the earpiece, allowing only you to listen to the audio.


Note that even if you bring down the phone back in your hands the audio which still may be playing will not automatically switch back to the speaker. Instead, it will pause at the exact moment when you took the phone away from your ear. This ensures that people around you don’t listen to your WhatsApp voice note even if you pull your phone down in the middle of playing it back.

How to Edit PDF Files for Free on Computer, Phone

Sharing information in the form of PDF documents is quite popular, but it is not easy to edit PDF files for free. The best part about PDFs is the fact that irrespective of the device or platform you use to view them, the content remains the same. So how do you edit PDF files for free?

We are sure when it comes to editing PDF documents, not many would want to pay the exorbitant subscription fee for Adobe Acrobat DC. As of matter of fact, one doesn't have to because we have come across a few ways that allow editing PDFs for free. In this guide, we tell you how to edit PDF file.

How to Edit PDF Files for Free on Computer, Phone - Aviance Tech News

How to edit PDF files

The first method we are going to suggest doesn't require you to download any app. t works on all the major platforms there are, i.e. Windows 10, macOS, Android and iOS. With that said, follow these steps.

  1. Open the website, www.pdfescape.com.
  2. Either drag and drop the PDF file you want to edit or select Choose File.
  3. Next, select the file you want to edit and upload it.
  4. After a few seconds of processing, the file will be available to edit. On the left pane, you will see tools that let you add text, blank white boxes to hide elements and even let you add fillable forms to your PDF. If that's not your thing, then you can also go freestyle. Besides, there are ways that allow users to annotate the document by adding sticky notes or simply formatting the text.
  5. Once you're done editing, you can save the PDF document locally on your device by hitting the Save and Download PDF button.

The next method we'll be suggesting lets users edit PDFs on their computers, that too offline. This is made possible through an app called Libreoffice, that lets you edit PDF files on your computer for free. Simply, follow these steps.


  1. Go to www.libreoffice.org/download/download > Choose your OS and hit Download.
  2. Once the setup file is downloaded, install it on your system and open it.
  3. After opening the app, click on Open File and choose the PDF document that you'd like to edit.
  4. Next, you'll see that you can easily select elements on the page to move them around and that text is easily editable. Make sure that your system has the fonts used in the PDF as that makes editing text much easier. Since each line of text or each image appears as a separate object, editing the PDF file should be a breeze. The only time-consuming aspect of this is alignment as the app has a tendency to mess that up.
  5. Once you're done editing, click File and select Export as PDF. This method works with scanned PDF files too.

These were two of the best methods that let anyone edit PDF files easily and efficiently. However, there's a bonus method that we'd like to suggest. Follow these steps.

  1. Visit the website, www.hipdf.com.
  2. Once the site is loaded, click on the second option from the top that says, PDF to word.
  3. After that, click Choose File > select the PDF file from your computer and click Open.
  4. Once the upload is finished, hit Convert and wait for the file to finish the conversion. After the conversion is done, hit Download.
  5. Doing this will download the file on your computer as an editable word document. So, open the file and make the changes that you wish to.
  6. Once you have made the changes, you can always convert this document into a PDF file by again visiting the hipdf website or via Libreoffice on your computer.

By following these easy methods you will be able to edit PDF documents, that too free of charge.

How to Enable Dark Theme on Google Docs, Slides and Sheets

If you're a fan of dark mode and your workflow involves using Google Docs, Google Sheets and Google Slides, rejoice because Google has recently rolled out a new feature that brings dark theme support to its Docs, Sheets and Slides apps. A dark theme not only saves your device's battery but is also easy on the eyes so that whenever you look at the screen, it doesn't feel uncomfortable. So, by following this guide, you can learn how to enable dark mode on Google Docs, Sheets and Slides on Android, iOS and the web.


How to Enable Dark Theme on Google Docs, Slides and Sheets


How to enable dark mode in Google Docs, Slides and Sheets on Android

Note, the dark theme feature is a recent roll out so there's a chance you might not see it right away on your Android device, but rest assured that you will get the feature soon. As for our experience, we tried Google Docs dark mode on our Google Pixel 2 XL running Android 11 beta, and it works perfectly fine.

Follow these steps to enable dark mode in Google Docs, Slides and Sheets on your Android phone or tablet.

  1. Open Google Docs, Slides or Sheets on your device. The process to turn on dark mode on all these apps is the same.
  2. Tap the hamburger icon > go to Settings > tap Choose theme.
  3. Select Dark to enable dark mode for the app.

However, if you wish to preview a particular file in light theme without turning off the dark theme for the app, there's a way to do that as well. Follow these steps.


  1. Open Google Docs, Slides or Sheets on your device.
  2. Considering dark theme is already on, open a file > tap the vertical three-dots icon > select View in light theme.

How to enable dark mode in Google Docs, Slides and Sheets on iOS

By tweaking a few settings on your iPhone or iPad, you can enable dark mode on Google Docs, Slides and Sheets. Follow the steps and thank us later.

  1. First, go to the App Store and download Google Docs, Slides and Sheets on your iOS device, if you haven't already.
  2. Now, before you go ahead and open the Google apps, you'll need to enable Smart Invert on your iOS device. To do that, go to Settings > Accessibility > Display & Text Size > toggle on Smart Invert.
  3. Exit Settings and open any of the preferred Google apps in question, you'll notice that now the app would be running a darker theme.

By doing this, you can preview your documents in dark mode on Google Docs, Slides and Sheets, but when you exit the app, there are colours and elements in iOS that don't play well. This is because Smart Invert is not a perfect dark mode solution. In that case, you can always turn-off Smart Invert after you're done using the Google apps. But we can understand, the process to turn on/ off Smart Invert can be long and tedious, so follow these steps to make it faster.

  1. Go to Settings > Control Centre > scroll down and add Accessibility Shortcuts.
  2. Go back > tap Accessibility > scroll down to the bottom and tap Accessibility Shortcut > check Smart Invert.

Now whenever you want to turn on Smart Invert, instead of going through the Settings menu, you can simply access the Control Centre on your iPhone or iPad, and enable or disable Smart Invert with just a single tap on the Accessibility Shortcut. You're welcome.

How to enable dark mode in Google Docs, Slides and Sheets on the web

Similar to iOS, there isn't an official method to turn on dark theme for Google Docs, Sheets and Slides while using these services on the web. Still, by tweaking a few settings in Chrome, you can make these aforementioned apps run in dark mode. Follow these steps.

  1. Open Google Chrome on your computer and enter chrome://flags/#enable-force-dark in the address bar.
  2. You'll see Force Dark Mode for Web Contents as disabled. Enable this option and relaunch Google Chrome.