Apple Adds Support for New Languages Across Lock Screen, Keyboard, and Search on iOS 18

Apple has once again set a new standard in enhancing user experience with the latest update, iOS 18. Among its many exciting features, one standout is the extensive support for new languages across the lock screen, keyboard, and search functions. This update reflects Apple's commitment to inclusivity and accessibility, ensuring that users worldwide can enjoy a seamless and personalized experience. In this detailed blog, we will explore the impact of these new language supports, the benefits they bring, and how to make the most out of these features.

Apple iOS 18 Language Update Launch Announcement


The Importance of Multilingual Support

Before delving into the specifics of iOS 18's new language features, it's essential to understand why multilingual support is crucial. Here are a few reasons:

  • Global Accessibility: Multilingual support ensures that users from different linguistic backgrounds can fully utilize their devices.
  • Enhanced User Experience: Personalized language settings improve user satisfaction and ease of use.
  • Inclusivity: Supporting multiple languages fosters a sense of inclusion and respect for diverse cultures.

New Language Support on the Lock Screen

1. Customizable Language Settings

With iOS 18, users can now customize their lock screen in their preferred language. This feature allows for a more personalized and welcoming experience every time the device is accessed. Here’s how to set it up:

  • Go to Settings: Navigate to the Settings app on your iOS device.
  • Select Language & Region: Tap on “General” and then “Language & Region.”
  • Choose Your Preferred Language: Select your desired language from the list.
  • Apply Settings: Confirm and apply the changes.

2. Localized Notifications

Another exciting feature is the localization of notifications. Now, all notifications that appear on the lock screen will be displayed in the user's chosen language, ensuring that important information is easily understood.

Enhanced Keyboard Functionality

3. Multilingual Typing

iOS 18 introduces enhanced multilingual typing capabilities. Users can now switch between languages seamlessly without changing keyboard settings manually. This feature is particularly beneficial for bilingual or multilingual users who frequently communicate in different languages.

  • Enable Multilingual Typing: Go to Settings > General > Keyboard > Keyboards and add the languages you use.
  • Switch Easily: Once added, switch between languages by tapping the globe icon on the keyboard.

4. Predictive Text and Autocorrect

The predictive text and autocorrect features have also been upgraded to support multiple languages simultaneously. This improvement helps in reducing typing errors and enhances the overall typing experience.

5. Voice-to-Text Support

Voice-to-text functionality now supports additional languages, making it easier for users to dictate messages, notes, and more in their preferred language.

Improved Search Functionality

6. Localized Search Results

With iOS 18, the search functionality has been significantly improved to support multiple languages. Users can now search for content, apps, and settings in their chosen language, and receive localized results that are more relevant and useful.

7. Language-Specific Siri Commands

Siri, Apple’s intelligent assistant, has also been updated to understand and respond to commands in more languages. This enhancement makes interacting with Siri more intuitive and effective for non-English speakers.

8. Universal Search Enhancements

The universal search feature, which allows users to search across the entire device, has been enhanced to support multiple languages. This means users can now find files, apps, and other content in their preferred language with ease.

Benefits of Multilingual Support in iOS 18

9. Increased User Satisfaction

By providing support for more languages, Apple ensures that users can interact with their devices in a way that feels natural and comfortable. This increase in user satisfaction can lead to higher user retention and brand loyalty.

10. Broader Market Reach

Supporting additional languages opens up new markets for Apple. It allows the company to cater to a broader audience, including regions where English is not the primary language.

11. Enhanced Communication

For users who communicate in multiple languages, the new features in iOS 18 make it easier to switch between languages, enhancing the efficiency and clarity of communication.

How to Make the Most of New Language Features

12. Explore Language Settings

Take the time to explore the new language settings in iOS 18. Customize your device to match your linguistic preferences for a more personalized experience.

13. Leverage Multilingual Typing

Enable multilingual typing to make switching between languages effortless. This feature is especially useful for users who frequently text or email in different languages.

14. Utilize Voice-to-Text

Make use of the improved voice-to-text functionality to dictate messages and notes in your preferred language, saving time and improving accuracy.

15. Optimize Search Functions

Experiment with the enhanced search functionality to quickly find content and settings in your chosen language. This can significantly streamline your workflow and improve productivity. 

The addition of new language support across the lock screen, keyboard, and search functions in iOS 18 is a significant step towards greater inclusivity and accessibility. These features not only enhance the user experience but also demonstrate Apple's commitment to serving a global audience. By exploring and utilizing these new capabilities, users can enjoy a more personalized and efficient interaction with their iOS devices. Whether you're switching languages on the keyboard, using voice-to-text, or searching for content, iOS 18 ensures that language is no longer a barrier to a seamless digital experience.

#iOS18 #AppleUpdate #MultilingualSupport #TechInnovation #MobileTechnology #UserExperience #GlobalAccessibility #LanguageFeatures

With iOS 18, Apple continues to set the bar high for mobile operating systems, ensuring that all users, regardless of their language, can fully enjoy the benefits of their devices.

How to transfer photos from iPhone to Computer

In today's world, taking pictures has become an integral part of our daily lives. With smartphones, it's easier than ever to capture memories and moments. However, the downside of this is that our phones can quickly fill up with photos, and we may want to transfer them to our computers to free up storage space. In this blog, we'll walk you through the steps of transferring photos from your iPhone to your computer.


how to transfer photos from iPhone to computer


Method 1: Using a USB Cable

The most common and straightforward way of transferring photos from your iPhone to your computer is by using a USB cable. Here are the steps to follow:

Step 1: Connect your iPhone to your computer using a USB cable.

Step 2: Unlock your iPhone and trust the computer if prompted.

Step 3: Open the Photos app on your computer (for Mac users) or File Explorer (for Windows users).

Step 4: Select your iPhone from the list of available devices in the app or File Explorer.

Step 5: Select the photos you want to transfer, and then drag and drop them to your desired location on your computer.

Method 2: Using iCloud

If you have iCloud enabled on your iPhone, you can also transfer your photos wirelessly to your computer. Here's how:

Step 1: Open the Settings app on your iPhone.

Step 2: Tap on your Apple ID at the top of the screen.

Step 3: Tap on iCloud.

Step 4: Turn on the toggle switch next to Photos.

Step 5: Wait for your photos to sync with iCloud.

Step 6: Open a web browser on your computer and go to iCloud.com.

Step 7: Sign in to your iCloud account.

Step 8: Click on Photos.

Step 9: Select the photos you want to transfer, and then click the download button (the one that looks like a cloud with an arrow pointing down) to save them to your computer.

Method 3: Using Third-Party Apps

There are several third-party apps available that can help you transfer your photos from your iPhone to your computer. Here are a few examples:

Dropbox: 

Install Dropbox on both your iPhone and computer, and then upload your photos to the app on your iPhone. The photos will automatically sync with Dropbox on your computer.

Google Photos: 

Install Google Photos on both your iPhone and computer, and then upload your photos to the app on your iPhone. The photos will automatically sync with Google Photos on your computer.

AirDrop: 

This is an exclusive feature for Apple devices, and it allows you to transfer photos wirelessly between your iPhone and Mac. To use AirDrop, make sure both devices are within Bluetooth and Wi-Fi range, and then follow the prompts on your iPhone and Mac.

In conclusion, transferring photos from your iPhone to your computer is a simple process. You can use a USB cable, iCloud, or third-party apps to do so. Try each method and see which one works best for you.

How to Hide Your Photos in iPhone Without Using Third-Party App?

How to Hide Your Photos in iPhone Without Using Third-Party App

 Make sure that your iPhone runs on iOS 14 before proceeding with the steps.

Your iPhone may have photos that you do not want to delete right away, but for some (privacy) reason, you also do not want them to be shown in your Photo Library. You can hide any of those photos in your iPhone without requiring any third-party apps. Apple has natively provided the option to let you hide your photos in your iPhone. You can use that option to make sure your photos won't be visible to your loved ones looking at your Photo Library.

How to hide photos in iPhone


For quite some time, Apple allowed users to hide photos from their Photo Library. But the hidden photos were a part of a ‘Hidden' album that was still visible in the Albums section of the Photos app. That experience was updated with the release of iOS 14 last year.

The iOS 14 release allows you to completely hide photos in your iPhone, without using a third-party app. Here's how you can do this.

How to hide photos in iPhone without using a third-party app

Before getting started with the steps on how you can hide photos in your iPhone without using a third-party app, make sure that your iPhone is running on at least iOS 14. It is also important to point out that the hidden album on iOS is enabled by default. But you can turn it off by taking the following steps. Also, you can follow the same steps to hide photos to hide your videos as well.

  1. Open Photos app on your iPhone.
  2. Select the photo or video you want to hide. You can also pick multiple photos or videos by tapping the Select button from the top-right corner of the screen.
  3. Tap the Share button and then select Hide from the menu.
  4. Confirm that you want to hide the selected photo(s) or video(s).
  5. Now, go to Settings and tap Photos.
  6. Scroll down and turn off the Hidden Album option.

You can follows steps 5 and 6 and turn on the Hidden Album option again to see the folder in the Photos app. It should be noted that any photos or videos you hide may appear on third-party apps. The given steps can also be followed on iPadOS to hide or unhide photos on an iPad.

How to Check Your iPhone Battery Health

Checking iPhone battery health is vital as it allows you to understand whether the inbuilt battery needs to be replaced. Poor battery health means that you would get fewer hours of usage between charges on your iPhone. Apple introduced the native tool to check battery health of your iPhone with the release of iOS 11.3 back in 2018. It is accessible across all iPhone models starting from iPhone 6. You can also find the same battery health tool on your iPad.

How to Check Your iPhone Battery Health


In this article, we are detailing the steps you need to follow to check your iPhone battery health.

How to check your iPhone battery health?

Before beginning with the steps you need to follow to check your iPhone battery health, it is important to note that the battery health tool available from Apple normally provides information on two distinct areas — maximum battery capacity available on your device and its peak performance capability. While the maximum battery capacity gives a measurement of the battery capacity in relation to when it was new, peak performance capability is measured to highlight whether the battery of your iPhone is currently supporting normal peak performance, or the performance management features are in place to restrict peak power.

  1. Go to Settings.
  2. Scroll down and tap the Battery option. You can also search for the battery settings directly through the search bar in the settings menu by swiping up.
  3. Tap Battery Health.

You'll then see the maximum capacity and peak performance capability of your iPhone battery. Apple will also show important battery notifications if the iPhone battery health is significantly degraded or if a new replacement battery is not verified by the system.

How to Maintain 100 Percent iPhone Battery Health, According to Apple

 Apple typically offers good battery life with its devices be it iPhone, iPad, Mac, Apple Watch models, or others. However, in the past, Apple has been accused of intentionally slowing down iPhone models with ageing batteries, and it recently paid $113 million (roughly Rs. 819 crores) to settle the BatteryGate case. While Apple believes this was to preserve battery health over long term use, it has since then introduced battery and performance management features to users, apart from sharing tips and recommendations to maintain battery health. Some of the general practices that Apple recommends include updating to the latest software, avoiding high ambient temperatures, removing certain cases while charging, and storing devices in a half-charged state when storing them over long periods of time.

How to maintain iPhone battery health


Apple on its website has a page detailing how to maximize battery life and lifespan of your iPhone. The first thing, is to keep it updated to the latest software.

Update your iPhone

  1. On your iPhone, go to Settings.
  2. Tap on General.
  3. Tap on Software Update.
  4. You should see the available update here. If you do see an update, tap on it and your iPhone will start updating. Make sure you have sufficient battery left.
  5. Alternatively, you can plug your iPhone into your computer and update it with the latest version of iTunes.

You can also preserve your battery life by adjusting your screen brightness and using a Wi-Fi connection wherever possible. You can either dim your iPhone's screen brightness or turn on auto brightness.


Dim display brightness, turn on auto brightness

  1. Open Control Centre.
  2. Drag brightness slider to the bottom.
  3. To activate auto brightness, head to Settings.
  4. Tap on General.
  5. Tap on Accessibility.
  6. Tap on Display Accommodations.
  7. Set Auto-Brightness to On.

Enable Low Power Mode

iPhone users can also enable low power mode when it starts to get low. If the battery drops to 20 percent, you will get a notification and Low Power Mode can be turned on with one tap. To manually turn on Low Power Mode:

  1. Go to Settings.
  2. Scroll down and tap on Battery.
  3. Toggle the Low Power Mode to On.

Users can view their iPhone battery usage information by going to battery settings (Settings > Battery). To conserve battery, iPhone users can also turn off settings like Background App Refresh and location services. Here's how:

Prevent apps from refreshing in the background.

  1. Go to Settings.
  2. Tap on General.
  3. Tap on Background App Refresh.
  4. Select Off to turn off Background App Refresh entirely.

Turn off location services for apps

  1. Go to Settings.
  2. Tap on Privacy.
  3. Tap on Location Services.
  4. Here you will see a list of apps using location services with an off toggle.

How to change your iMessage phone number

 Switch your iMessage number (or email) with ease


One of the greatest benefits of Apple’s ecosystem is Messages, especially when used between multiple users. With optional read receipts, it’s own App Store, and support for threaded conversations in iOS 14, it’s come a long way.

One of the most confusing aspects, though, can be how your Messages are tied to you. Often when setting up a new iPhone it’ll default to your Apple ID email address, and while that may allow you to chat away, you’ll soon want to swap it for your phone number to make it easier to contact you.

You may also find that if you’ve changed your mobile number, you’ll need to get this switched over via this process, too. Here’s how to do just that.

1. Open settings 

Settings

As with any tweaks you make to iOS, you’ll need to head into your Settings menu, rather than messages itself. You’ll need to go to Settings - that's the one with the grey cog icon - then scroll down to Messages.

From here, you can switch off iMessage entirely, or change whether your photo and name are shared with new contacts. For now, though, head into Send & Receive.

2. Send and receive settings 


Here you’ll find two lists, with all associated contact information for your Apple ID. Here, you can set your iMessage up to only work for email addresses, phone numbers, or any mix of the two.

You can also change your number or email address by pressing on them in this menu. This can be handy if you have an email address that only a certain contact can reach you on, for example. 

It’s worth noting, though, that people won’t be able to email your associated ID to reach you on iMessage – it’s strictly for that platform, so they’d need to send a proper email instead.


As for messages you send, most people simply start conversations from a phone number to prevent confusion alongside your other, non-Apple device messages.

Text message forwarding (optional)


If you’ve got an iPad, MacBook, or anything else that you want to be able to access not just your iMessages, but your normal texts as well, you’ll need to switch on Text Message Forwarding.

In Settings, then Messages, head to Text Message Forwarding to enable or disable other devices. These devices will need to be approved before they’ll appear on this list, so grab your iPad or Mac first.

* All Images Credit: Apple 

iOS 14: How to Enable Back Tap on iPhone

Want to know how to take a screenshot on iPhone without hitting any buttons? Read on.

Did you know your iPhone has a cool hidden feature that lets you trigger certain actions whenever you tap the rear panel of your phone? For instance, 

you can now take a screenshot by double tapping or open the camera by triple tapping the rear panel of your iPhone. With the new back tap feature in 

iOS 14, the entire rear panel of your iPhone basically transforms into a big touch-sensitive button, letting you interact with your phone like never before.

Apart from the available actions present in the Back Tap menu, the feature also integrates well with Apple's Shortcuts app. This further makes it possible 

to assign almost any action that's available as a shortcut on the internet. In this guide, we tell you how to use the new Back Tap feature in iOS 14.


iOS 14: How to enable and use back tap feature

Do note that this feature only works on iPhone 8 and newer models running iOS 14. Additionally, this feature is not available on the iPad. With that being said, 

follow these steps to enable back tap on your iPhone.

  • On your iPhone, go to Settings.
  • Scroll down a bit and go to Accessibility.
  • On the next screen, under Physical and Motor, tap Touch.
  • Scroll to the end and go to Back Tap.
  • You'll now see two options — Double Tap and Triple Tap.

You can assign any action that's available in the list. For example, you can set the Double Tap action to take a quick screenshot, while the Triple Tap action can be assigned to quickly access the Control Centre. After you've assigned the actions, exit settings. You can now start using back tap on your iPhone.


iOS 14: Back tap integration with Shortcuts

Back tap also integrates well with the Shortcuts app. This means, besides having the actions that are already present in the back tap menu, you can also assign 

custom shortcuts if you want to. For instance, if you have a shortcut that lets you run the Instagram story camera from the Shortcuts app, you can now assign it to a simple double- or triple-tap.

All you need to do here is to make sure to download Apple's Shortcuts app on your iPhone. Once the app is installed on your phone, visit RoutineHub to get a plethora of custom shortcuts. To download a shortcut and assign it to back tap on your iPhone, follow these steps.

  • Go to RoutineHub on your iPhone.
  • Find the shortcut that you'd like to download and open it.
  • Hit Get Shortcut to download it on your iPhone.
  • Doing this will redirect you to the Shortcuts app. Scroll down to the bottom and tap Add Untrusted Shortcut.
  • Exit the Shortcuts app once your new shortcut is added.
  • Go to iPhone's Settings and repeat the earlier steps to assign this new shortcut as a double tap or a triple tap action.

This is how you can enable and use the new back tap feature in iOS 14. Let us know in the comments what you plan to do with this nifty new feature.

iPhone 12 Camera Module Can’t Be Replaced by Third-Party Technicians - Reports

iPhone 12 reparability test by iFixit reveals that the camera module on the latest Apple offering is not swappable. If the iPhone 12 camera module is transferred to another iPhone 12, it becomes entirely unusable. iFixit says that Apple may be looking to come down hard on third-party repairs with this iPhone 12 camera issue. Furthermore, Apple's internal training guide accessed by iFixit ascertains that this isn't a hardware defect but is a software tweak that Apple may or may not have intentionally introduced. The guide explains to authorized technicians that they will need to run Apple's proprietary cloud-linked System Configuration app to fully repair cameras and screens on iPhone 12 and later phones.


iphone-12-camera-module-third-party-repair-unreliable-ifixit-teardown


In its report, iFixit says that when an iPhone 12 camera is transferred to another iPhone 12, it doesn't work reliably at all. The report explains that it appears to work initially, but ‘fails miserably in actual use.' After the swap, the camera only responds to certain modes, hangs occasionally, refuses to switch to ultra-wide mode, and becomes completely unresponsive on some occasions.


It should be noted that the same behavior does not get repeated when the iPhone 12 Pro cameras are swapped, and it only seems to be affecting iPhone 12 units. This could be a software tweak that Apple may have unintentionally introduced, and a fix may be rolled out now that the problem has been called out. However, given Apple's known discouragement against repairing its devices with third-party technicians, this little tweak – if introduced intentionally – doesn't come as too much of a surprise.

iFixit also dug into Apple's authorized internal training guides for iPhone 12. It explicitly tells technicians that starting with iPhone 12, they will need to run Apple's proprietary cloud-linked System Configuration app to fully repair cameras and screens.

How to Merge PDF Files on Computer, Phone

 There are a bunch of methods that let you combine PDF files. After all, merging PDF files solves quite a few problems, one of them being the ability to share multiple PDF documents in one. This way you don't have to open the files one by one, then close and repeat. In this article, we'll show you how to merge PDF files on your computer and smartphone.

How to Merge PDF Files on Computer, Phone

Merge PDF online


The first method we are suggesting doesn't require you to install any third-party app on your device. This method is absolutely free and it works online for all major platforms, i.e. Windows 10, macOS, Android and iOS. Now, follow these steps.


  1. On your computer or smartphone, visit ilovepdf.com and select the first option, Merge PDF.
  2. On the next page, you'll be asked to select the PDF files you'd want to merge, go ahead.
  3. After selecting your files, select Choose > hit Merge PDF.
  4. On the next page, you'll get a prompt that your files have been merged. Hit Download Merged PDF to go ahead.

Merge PDF on Android


If you're an Android user, you'll be glad to know that there are many apps on the Google Play that let you merge PDF files for free. We tried PDFelement and found it to be among the best. Follow these steps to merge PDF files on your Android phone.

  1. Go to Google Play and download and install PDFelement by Wondershare. After the app is installed, open it and the first thing you'll need to do is configure it.
  2. Tap on Configure > Allow access to the Downloads folder. This will set this folder as an authorized path.
  3. Go back to the main menu and tap the hamburger icon in the top left. Next, tap Merge documents > tap the + icon that you see up top > hit Authorized path.
  4. Select the PDF files you wish to merge. Repeat the process by tapping the + icon and selecting multiple files.
  5. Once you're done selecting, tap the merge button in the bottom right corner to start the process.
  6. After the merging is done successfully, tap save > tap authorized path > edit the name at the bottom and hit Create.
  7. Your file will then be saved on your phone.

Merge PDF on Mac

By far, this is one of the easiest methods that let you merge PDF files. If you own a Mac, follow these steps.

  1. Go to Finder and open the folder where your PDF files are saved.
  2. After that, select the PDF files that you wish to merge > right-click > click Quick Actions > and select Create PDF.
  3. This will create your merged PDF file.

Merge PDF on iPhone, iPad


Similar to Mac, there's a native way on your iOS device to merge PDF files. This one's also pretty easy and straightforward. Here's how to do it.

  1. Open the Files app on your iOS device and locate the PDF files you want to merge.
  2. Tap Select at the top > mark the PDF files > tap the three-dots icon in the bottom-right corner > tap Create PDF. That's it.

These were some of the easy methods that let you easily merge PDF files on your computer and smartphone for free.

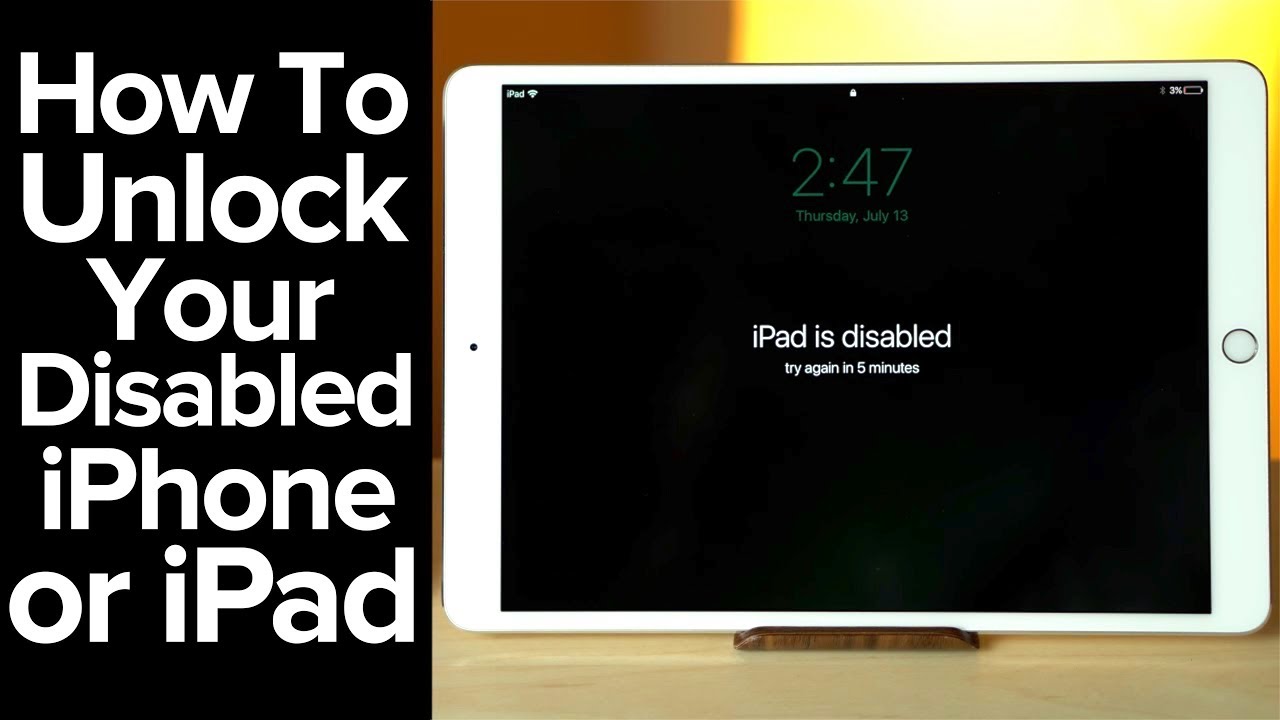
How to Restore a Disabled iPhone or iPad

It's common that we tend to forget our iPhone/iPad passcode and leads to temporary disabling of iPhone/iPad. Don't worry about it.. It's just a temporary issue and can be solved easily. In this article, am providing the steps to enable the disabled iPhone or iPad.

How to unlock a Disabled iPhone or iPad

Why is my iPhone or iPad is disabled ?

Before started with the steps, let's talk about why iPhone or iPad gets disabled. When you enter the wrong passcode on your iPhone multiple times, it gets disabled and you will have to wait for some time before you can attempt to enter the passcode again. For the first five wrong passcode entries, you'll only get prompted by a notification saying that the passcode is wrong. If you enter the wrong passcode for the sixth time, your iPhone will get disabled for 1 minute. After the seventh wrong attempt, your iPhone will now be disabled for 5 minutes. The eighth attempt disables your iPhone for 15 minutes, the ninth one disables it for one hour, and the tenth one permanently disables the device. Entering the wrong passcode for 10 times can even erase all your data if you have enabled that setting in iOS.


After 10 wrong passcode attempts, your only option is to restore the iPhone to factory settings. This means that all your personal data, photos, videos etc. will be lost, which is a good time to remind you to backup your iOS device regularly via iCloud or your computer.

icloud backup ios icloud

How to restore disabled iPhone without iTunes

If your iPhone is disabled and you want to restore it without iTunes, here are your best options.

  1. If your iPhone is not permanently disabled, you can enter the correct passcode and the iPhone will work just fine.
  2. If you forgot your passcode, you can follow the steps below to restore your iPhone to factory settings. This will wipe all your data. You can then restore your iPhone's data from a backup via iCloud or iTunes. This is the best way to restore disabled iPhone without iTunes.

How to restore disabled iPhone SE, iPhone 6S, iPhone 6S Plus, or older iOS devices

  1. Press and hold power button until the power-off slider appears. Drag the slider to turn off your iPhone.
  2. While pressing and holding to the home button, connect your iPhone to the computer. Keep holding the button until you see the recovery mode screen.
  3. On your computer, you will have to locate your iOS device on iTunes (Windows or older macOS versions) or if you have macOS Catalina, Finder. Open the correct app and then click on the iOS device you have connected. Now click Restore.
  4. On the next screen, you'll get a prompt asking if you want to restore your iPhone to its factory settings. Continue by clicking on Restore and Update.
  5. Next, follow the on-screen prompts and following that Finder will automatically download the new software for your iPhone. Wait for the process to finish, and once that is done, set up your device as new.


How to restore disabled iPhone 7 and 7 Plus

  1. Press and hold power button until the power-off slider appears. Drag the slider to turn off your iPhone.
  2. Next, connect your device to the computer while holding the volume down button. Keep holding the volume down button until you see the recovery mode screen.
  3. Now follow step 3 onwards as mentioned above.

How to restore disabled iPhone 8, iPhone X, and newer iOS devices

  1. Press and hold power button and either volume button until the power-off slider appears. Drag the slider to turn off your iPhone.
  2. Next, connect your device to your computer while holding the power button. Keep holding the power button until you see the recovery mode screen.
  3. Now follow step 3 onwards as mentioned for restoring iPhone SE, 6S, and older iOS devices.

How to schedule WhatsApp Messages on Android and iPhone

WhatsApp is one of the most used and popular Application in the market. Everyone is interested in knowing tricks and tips about it.  This article reveals few WhatsApp tricks for iPhone & Android users.

Here are simple steps to be followed.

How to Schedule WhatsApp Messages on Android and iPhone

How to schedule WhatsApp message in iPhone


There isn't any third-party app available on iOS through which you can schedule WhatsApp messages. However, there's another way to do this process on iPhone through Siri Shortcuts, an Apple app that will rely on automation to send your WhatsApp message at a scheduled time. Here's what you need to do to schedule WhatsApp messages on iPhone.

  1. Go to the App Store and download the Shortcuts app on your iPhone and open it.
  2. Select the Automation tab at the bottom.
  3. Tap the + icon in the top-right corner and tap Create Personal Automation.
  4. On the next screen, tap Time of Day to schedule when to run your automation. In this case, select the dates and times when you want to schedule WhatsApp messages. Once that is done, tap Next.
  5. Tap Add Action and then in the search bar type Text and from the list of actions that appear, select Text.
  6. After that, enter your message in the text field. This message is whatever you want to schedule, such as, ‘Happy birthday.'
  7. After you're done entering your message, tap the + icon below the text field and in the search bar look for WhatsApp.
  8. From the list of actions that appear, select Send Message via WhatsApp. Choose the recipient and hit Next. Finally, on the next screen, tap Done.
  9. Now at the scheduled time, you'll get a notification from the Shortcuts app. Tap the notification and it will open WhatsApp with your message pasted in the text field. All you have to do is hit Send.

One more thing to note is that you can only schedule WhatsApp messages for up to a week, which is kind of a bummer but at least now you know to at least how to schedule a message for up to a week.

If that's too short a limit for you, you can always try this one. This is one of the most complex Siri Shortcuts we've ever come across but it does schedule WhatsApp messages for any date and time if you configure it properly. It worked well on one of our iPhone but kept crashing on the other, so your mileage may vary with this one. However, we were able to schedule a message using both methods so you can choose the one you like.

How to schedule WhatsApp message on Android


As mentioned above, WhatsApp doesn't have an official feature to schedule messages. However, if you are using an Android smartphone, you can schedule messages on WhatsApp with the help of several third-party apps. Yes, there are several third-party apps out there that promise to do the job, but there's only one — SKEDit — that does it perfectly. Follow these steps to know how to schedule WhatsApp message on Android:

  1. Google Play Store > download and install SKEDit > open the app.
  2. Upon first launch, you'll have to sign up.
  3. Once you've signed in, you've to tap WhatsApp on the main menu.
  4. On the next screen, you have to grant permissions. Tap Enable Accessibility > SKEDit > toggle on Use service > Allow. Now, return to the app.
  5. You'll now have to fill in the details. Add the recipient, enter your message, set the schedule date and time and select if you wish to wish to repeat the scheduled message or not.
  6. Below, you'll see one final toggle — Ask me before sending. Toggle it on > tap the tick icon > your message will now be scheduled. Whenever the day and time of your scheduled message arrives, you'll receive a notification on your phone asking you to complete the action. Tap Send and you'll see your scheduled message being sent in real-time.
  7. However, if you keep the Ask me before sending toggled off, in that case when you tap the tick icon, you'll be asked to disable your phone's screen lock. You'll be also be asked to disable your phone's battery optimization as well. Doing this, your scheduled message will be sent automatically, which means you won't be asked to give any input on the phone, making the process instant. But then again, not having a screen lock affects your phone's privacy, which is a huge drawback. This is why we won't recommend scheduling WhatsApp messages this way.