How to Disable Google Meet in Gmail

Google Meet competes against Zoom, Microsoft Teams, JioMeet and other video conferencing apps. Recently, Google began rolling out a feature that integrated the Google Meet button in the company's mail app, Gmail. This allowed users to start a meeting on Google Meet by simply clicking a button right next to the Mail button in Gmail for both Android and iOS.

How to Disable Google Meet in Gmail

However, if you don't like this change and want Google Meet and Gmail to work as separate apps, there's a way to get rid of Meet in Gmail. Follow this guide as we tell you how to remove the Google Meet tab from your Gmail inbox. 

How to remove Google Meet tab from Gmail

Before we start, you should know that not all users can see the Google Meet tab in the Gmail app on their respective Android phones or iPhones because, as of now, the Google Meet tab is only appearing for those who have paid G Suite account on their devices. However, if you're using Gmail on a computer browser, the Meet tab can be found on the left, sitting right above Hangouts. Follow these steps to remove Google Meet from Gmail.

Remove Google Meet tab from Gmail app on Android and iOS

If you're using the Gmail app on your Android phone or iPhone, and you want to disable the Google Meet tab in your inbox, follow these steps.

  1. Open Gmail on your phone > tap the hamburger icon > go to Settings.
  2. Tap your email address to go ahead. You'll need to individually disable the Meet tab for each of your email addresses, if in case you've multiple accounts.
  3. Now, scroll down and locate the Meet tab > uncheck Show the Meet tab for video calling.
  4. With this done, your Gmail app will revert to its old design.

Remove Google Meet tab from Gmail for Web

Follow these steps to remove the Meet tab in Gmail for the web.

  1. On a computer, open Gmail > hit the cog icon to go to Settings > click See all settings.
  2. Click Chat and Meet > enable Hide the Meet section in the main menu.
  3. That's it, you won't see the Meet tab residing over Hangouts anymore.

By following these simple steps, you can remove the Google Meet tab from Gmail and revert to its old design.

How to create and post 3D Photos on Facebook


In order to give an immersive feel to regular photos, you can use the 3D Photos feature in Facebook to add a third-dimension to normal photos captured using smartphones. Also, Facebook allows users to convert them into 3D and share them on their News Feed, a group or a page.

Read on to know how to create 3D Photos and post it on Facebook.

Pre-requisites:
Latest version of Facebook app
Facebook account and login credentials 


Compatible smartphones

Android:
Samsung Galaxy Note 8, Note 9
Samsung Galaxy S9+, S10, S10E, S10+, S10 5G
Samsung Galaxy Fold
Google Pixel, Pixel XL
Google Pixel 2, Pixel 2XL
Google Pixel 3, Pixel 3XL
Google Pixel 4, Pixel 4XL
Many 2014 + devices

iOS:
iPhone SE
iPhone 6S

Recommended by Colombia

iPhone 7, 7+
iPhone 8, 8+

iPhone X, XR, XS, XS Max

iPhone 11, 11 Pro, 11 Pro Max


Steps to create 3D Photos on Facebook and post


Step#01:Open Facebook app on your smartphone

Facebook App


Step#02:On News Feed page, tap on ‘Write something here…’ box


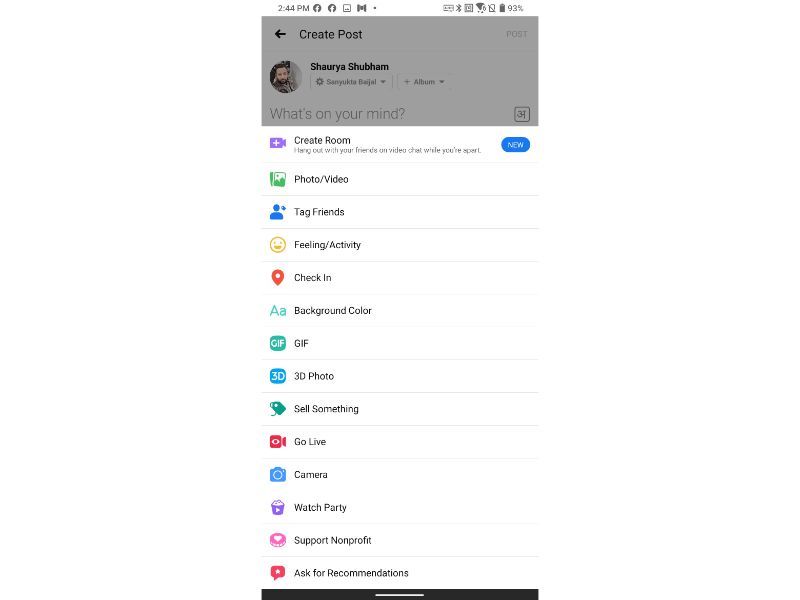
Step#03:Scroll-down and tap on 3D Photos option

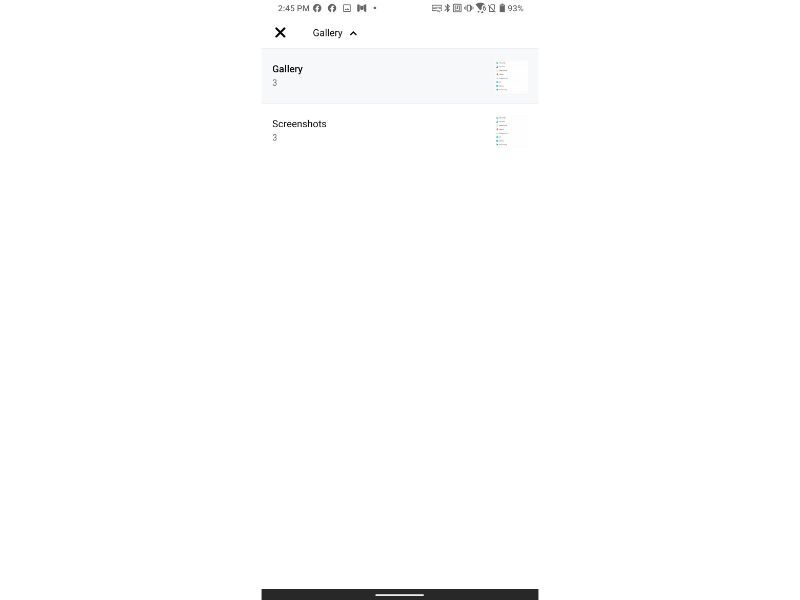
Step#04:Choose a photo from the gallery and tap on the Post button


Additional Tips:
  • 3D photos cannot be edited. Also an edited photo might not get converted into 3D photo.
  • 3D photo posts do not support multiple photos that means only one 3D photo can be posted at a time.
  • 3D photos can not be added to an album.
  • 3D photos can not be monetized.

How to make WhatsApp video or voice calls via Google Assistant


Google has recently added a feature in the Google assistant where users can make WhatsApp video/voice calls by just using their voice. This means that the new feature enables users to make WhatsApp calls by using voice command.

So far, Google assistant can only allow users to make network calls while video calls via its Duo and Hangouts application. The feature can come handy for those working from home culture as well as for group video calls among friends/relatives.

So, wondering how to go about it, follow the steps below.

v


Pre-Requisites:

  • Android 5.0 and above
  • Google app version 6.13 or higher
  • Google Play services
  • 720p or higher screen resolution

Steps to make WhatsApp calls using Google Assistant:

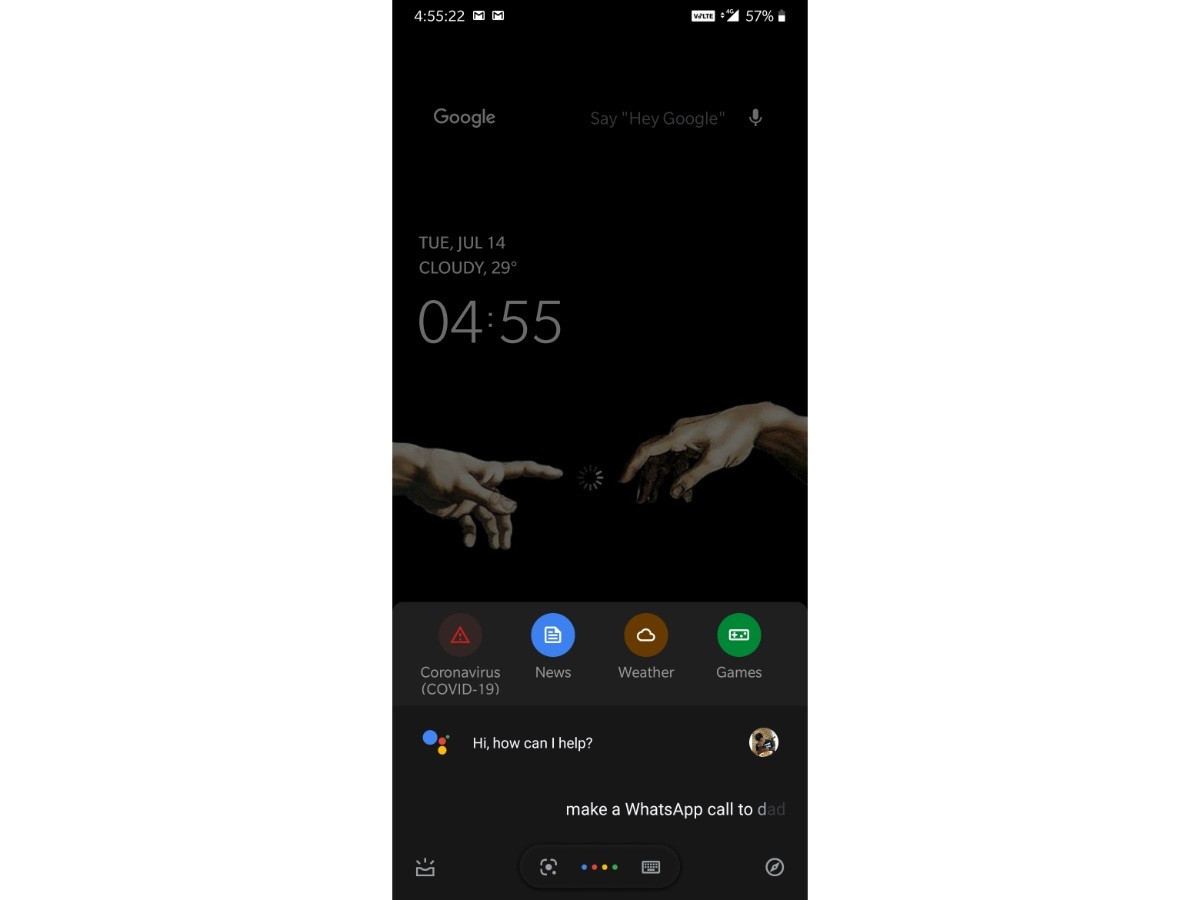
Open Google Assistant either using the wake-up word or using the dedicated button

Wake up word can be "Hey Google" or "Ok Google"

How to make WhatsApp video or voice calls via Google Assistant


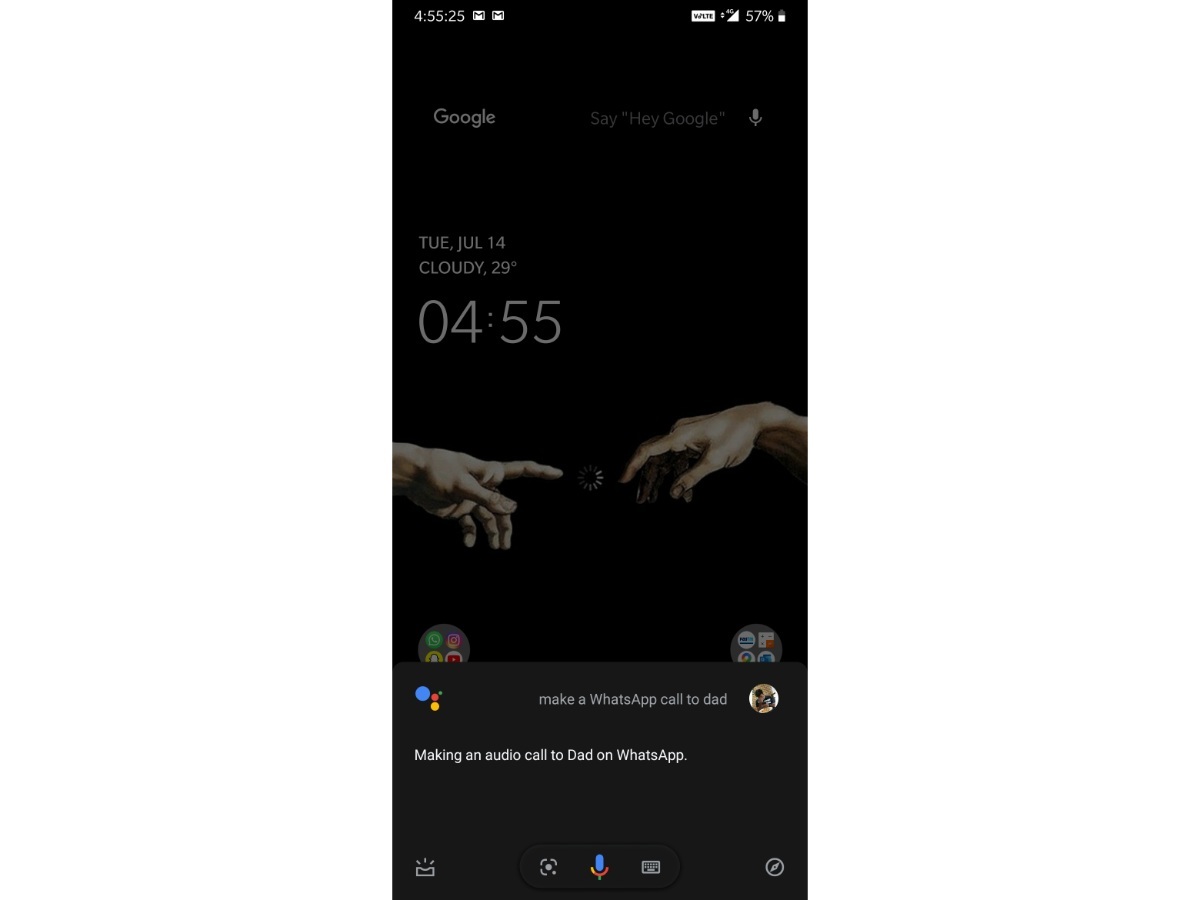
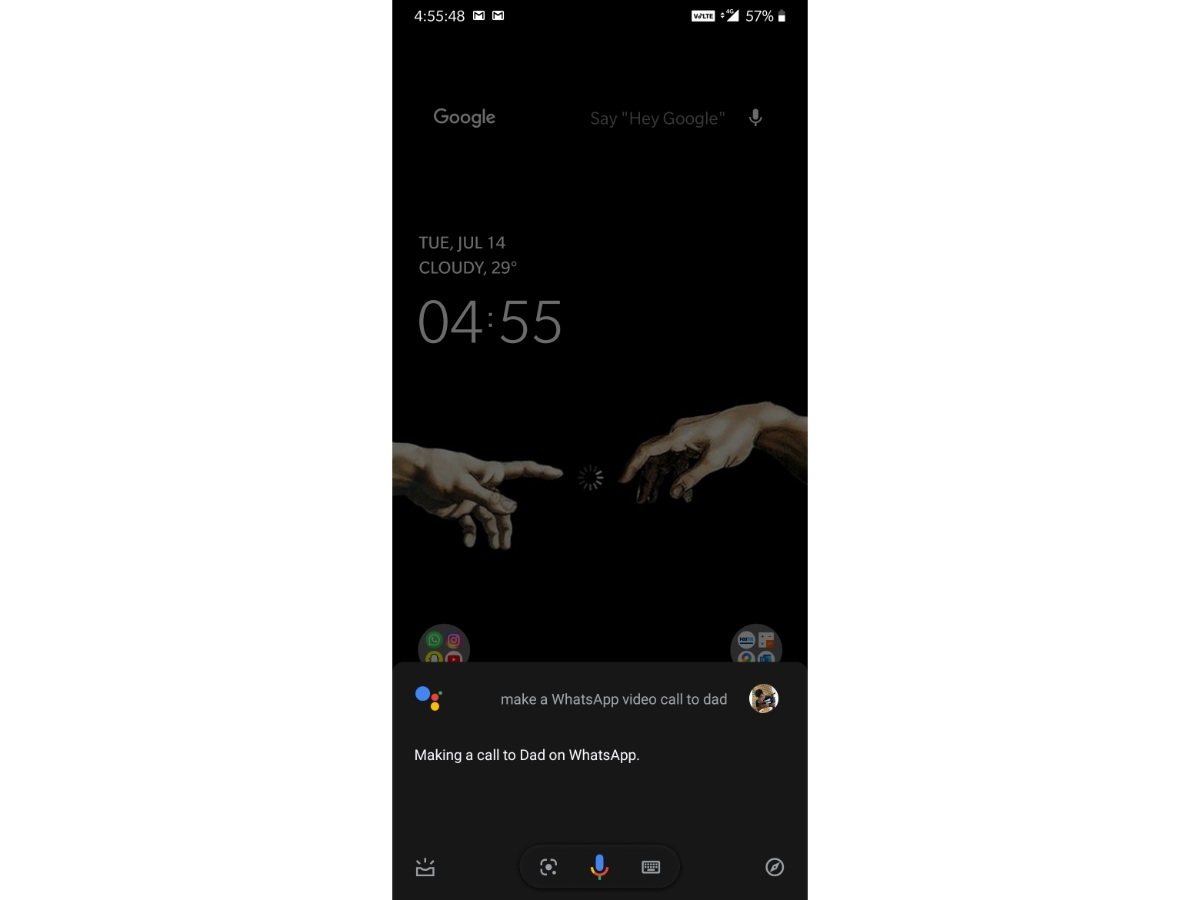
Now, all you need to do is order your assistant to make a voice/video call using WhatsApp

To make voice calls: Say “Make a WhatsApp call to Dad"


To make video calls: Say ‘‘Make a WhatsApp call to Dad"

It will then respond to your command and call the person


Do note while giving a voice command to Google assistant to make a WhatsApp call to someone speak out the person’s contact name saved on your phone.

How to use the new screen sharing feature on Facebook Messenger app

Facebook Messenger now lets you share other open apps, browser tabs, photos, videos and more during your video calls. And even better, you don’t have to wait for it to roll out to your preferred platform: The new screen-sharing feature is available now on Android, iOS and desktop versions of Messenger, Messenger Rooms, Workplace Rooms and any other Facebook app in which you can make a video call.

Facebook Messenger Now Gets Screen Sharing Feature on Android, iOS ...

Naturally, the feature works a little differently depending on your device. Desktop users can choose to share specific applications, browser windows or their entire desktop view, while mobile devices will broadcast whatever is currently open on their screens.

The number of participants is restricted based on which service you’re using. Normal Messenger calls will let you broadcast your screen with up to eight other people in a single call, while Messenger Rooms currently allows 16 people in screen-share sessions. Facebook plans to bump that limit from 16 to 50 in the coming weeks, and will be adding additional controls for Messenger Rooms so whoever created the call can set restrictions for who can share their screen.

For now, though, all call members can share their screen at any time during the call.

How to screen share in a Facebook video call

The screen share feature is only available in the latest version of Facebook’s various Messenger apps, so make sure your apps have been updated before you try. (Desktop users don’t have to do anything.). Also, all devices in a call must support screen sharing in order to use it.

With those requirements out of the way, here’s how to screen share in a Facebook video call on mobile and desktop:


On desktop (via web browser)

  1. Open Messenger.com, Facebook.com, Messenger Rooms or Workplace Rooms.
  2. Start a video call or create a new room.
  3. Click “Share screen” from the bottom menu.
  4. Select “Entire screen,” “Application window” or “Browser tab.”
  5. Once screen sharing has started, you can keep the call in the background and click around the shared tabs/apps if you want.
  6. Press “Stop” at the top of the call window to end the screen share at any time.

On mobile

  1. Open the Facebook Messenger app (or one of the other supported Facebook apps).
  2. Start a video call.
  3. While in the call, swipe up to expand the options bar.
  4. Tap “Share your screen,” then “Start sharing” and finally “Start broadcast.”
  5. Once the screen share has started, you can navigate to your other apps while the video call is in the background.
  6. Swap back to the video call to stop screen sharing.

WhatsApp: How to See Deleted Messages on Android

WhatsApp is one of the most popular messaging apps in the world right now. The Facebook-owned company in 2017 released a feature that allows people to delete their own messages from WhatsApp. Using this feature removes photos, videos, or messages completely from WhatsApp, which means that no one, including you, can see these messages after they are deleted. However, there is a way to see deleted messages on WhatsApp and we'll get to that shortly.

WhatsApp: How to See Deleted Messages on Android

In case you are planning on using this guide to reveal deleted messages, please remember that there's always a price to pay to access WhatsApp features that are not officially supported. In this case, the method we're suggesting will expose all of your notifications including OTPs and bank balance details, to a third-party app, and we can't guarantee that this data will remain private. Please use this method at your own risk, and only if seeing WhatsApp messages others have deleted is absolutely essential to you.

How to see deleted WhatsApp messages

Whenever someone deletes a WhatsApp message, in the chat it shows a message that reads, ‘This message was deleted'. If you have an Android smartphone, follow these steps to see deleted messages.


  1. Download and install WhatsRemoved+ from Google Play.
  2. Once downloaded, open the app and finish setting it up by granting access to all the permissions the app asks for.
  3. After granting the permissions, go back the app and now you'll be asked to select the app/ apps of which you want to save the notifications and detect changes. From the list below, select WhatsApp and tap Next.
  4. On the next screen tap Yes, Save Files followed by tapping Allow. This will finish setting up the app and it will be ready for use.
  5. From then on every notification that you receive on WhatsApp, including the deleted messages will be present on WhatsRemoved+ app. All you need to do is to open the app and from the top bar select WhatsApp.

There's no such app available for iOS, which is good for your privacy but not good if you need to see deleted WhatsApp messages.

How to Charge your Smartphone Faster

With so many phones and tablets not supplied with USB chargers these days, it's possible that your current charger isn't charging your phone or tablet as fast as it could be. Here's how to charge your phone or tablet faster.


Quick & Simple Ways to Charge Your Smartphone Faster

Before you can understand how to charge your phone or tablet faster you need to understand what's actually happening when you plug a USB cable into your phone: not all chargers are created equal.

You've probably noticed that your phone or tablet will charge much slower when it's connected to a PC or laptop's USB port than when it is to a mains power adaptor. And you may have noticed your phone will charge faster when connected to the charger that came with your tablet. That's because different chargers have different power outputs.

While a PC's USB port is specified at 2.5W for USB 1.0 and 2.0 and 4.5W for USB 3.0 (so always use a USB 3.0 port in preference to USB 1.0 or 2.0 when available), a standard phone charger might be rated at 5W and a tablet charger 10W, for example.

[We calculate the wattage by multiplying the current (the number of amps) and the voltage. So, if your charger is specified at 5V, 1A, it can supply 5W. If it is specified at 5V, 2A it can supply 10W.]

These days you can also get chargers that support significantly faster charging speeds. USB-C Power Delivery operates at up to 100W, for example, though no phone can accept quite that much power... yet.

Qualcomm's Quick Charge technology is something found in phones and tablets that run recent Snapdragon processors, and it's no longer restricted to the flagships. The most recent Quick Charge 4+ standard can offer compatible phones up to 50% charge in just 15 minutes. In order to benefit from this faster speed both your phone and your charger must be compatible.

Some manufacturers now specify their own fast-charging technologies, usually dubbed Turbo Charge or something similar. But in order to meet the speeds promised you will need a charger capable of delivering that amount of power. 

We've rounded up some of the best chargers for your phone or tablet, as well as some great value Power Delivery chargers.

We are starting to see faster wireless charging come on to the scene, with Xiaomi's Mi 9 accepting up to 20W, but generally speaking it is still going to be significantly slower than charging your phone via a traditional mains adaptor and USB cable.

Can I use a tablet charger with a phone?

You can use any USB charger with any phone or tablet, with the only caveat that if there isn't sufficient power available you may find your device won't charge - this is often the case with iPads, which will not charge from a PC's standard USB port.

Note that your device will draw only the power it requires. If you plug a 10W charger into a phone that accepts only 5W, it will still draw just 5W and won't charge any faster than it would with a lower-specified charger.

However, many phones and most tablets will accept a higher input. Check the spec of your phone and your charger now to see whether you could be benefiting from faster charging.

What else can I do?

Several tips are often bandied around that claim to allow for faster charging. One of those is to remove your phone's case. We're not convinced by the success of this tip, although you could argue that by avoiding excessive heat build-up you will prolong the life of your device's battery, allowing it to operate at maximum performance for longer.

Another potentially useful tip, if you can bear to go offline for an hour or two, is to put your phone or tablet either into Flight mode or switch it off during charging. This may charge your device quicker because it isn't busy doing any other tasks that would otherwise place a drain on the battery.

Instagram Tips and Tricks to Master the Social Network

Instagram is one of the world's most popular social networks. There is a lot more to it than just posting photos and videos. You can use it to edit photos and save them without posting, decorating your profile with special fonts, scheduling photos and videos, and much more. In this list of Instagram tricks, we will show you everything you need to master the social network.

Instagram Tips and Tricks to Master the Social Network

Best Instagram tips and tricks

1. Save a High-Res Photo Without Posting

Follow these steps to save high-resolution photos edited from Instagram without posting them.

  • Open Instagram > tap your profile > tap the hamburger icon > go to Settings.
  • Now, tap Account > tap Original photos > turn on Save Original Photos.
  • Similarly, if you're using an Android, tap Account > tap Original Posts > turn on Save Original Posts.
  • From now on, whatever you post will be saved locally on your device. However, the plan is to save edited high-res photos without posting them online and this is how you can do it.
  • After enabling the suggested setting, put your phone on Airplane Mode.
  • Now open Instagram > hit + > add any photo. Go ahead and edit it. Keep going and once you are on the last page, skip adding the caption or location and simply post the picture.
  • So, because Airplane mode is turned on, Instagram won't be able to post the picture, but in return, you will have yourself the same edited photo in your phone's gallery.
  • Now, before turning off Airplane mode, make sure that you have deleted the picture on Instagram that wasn't posted. This is because if you don't delete it and turn off Airplane mode, the picture will automatically be posted once your device is connected to the internet.

2. Schedule Instagram Posts

One way is to keep posting one travel picture every day. So, how do you do that? Follow these simple steps.

  • The first method to schedule posts requires you to have a business account. To turn your account into a business account, open Instagram and tap your profile icon. Now, tap the hamburger icon in the top-right and go to Settings. After that go to Account and at the bottom you'll see an option that lets you create a business account, select it and follow the prompts to transform your account into a business account.
  • Note that switching to a business account means your profile will be public because business accounts can't be private. If that's a problem, I'd suggest you skip to the next tip.
  • Moving on, visit facebook.com/creatorstudio on your computer. The process can be done on a phone as well, however, the experience is not that smooth on smartphones.
  • Now, once this site is loaded, click the Instagram logo up top and connect your Instagram account with this page in order to go ahead.
  • You now have to click Create Post and click Instagram feed. Now, simply add the photo that you'd like to schedule. Add its caption, its location and once you're done doing all this, click the down arrow right next to Publish, and select Schedule. Now, enter the time and date, and once you're done, hit Schedule. Doing this will schedule your post for the future.
  • This is an official method and for now it only works for business accounts. However, if you have a normal account and you want to schedule posts on Instagram, in that case you can do it via a third-party app.
  • Download the Preview app on your iPhone. To download on Android, click here.
  • Follow the on-screen prompts and set it up.
  • So, once your Instagram account is linked, from the homepage, click + and select Photos/Videos. After that choose the photo or video that you'd want to schedule.
  • Once that photo is loaded on the main page, you tap it. After that, there's an option to edit the photo as well if you want to. Once done, hit the thought bubble.
  • On this page, you can add captions and hashtags, but most importantly, you need to tap Schedule Post. Once you do that, you'll be asked to choose the date and time. Finally, hit Done.
  • Your post will now be scheduled for the future. You will be able to check and manage your scheduled posts by hitting the calendar icon up top. Also, if you wish to delete the scheduled post, then that's possible as well.

3. Zoom In to Instagram Profile Pictures

To access a full-size Instagram Profile picture, follow these steps.

  • Visit instadp.com and enter the account username of the person whose profile photo you want to view in full size.
  • Once you've found the profile you were looking for and it is loaded, simply hit Full Size and scroll down. You can then either screenshot it to make a meme or do whatever you wanna do. That is literally it. You're welcome.

4. Post Without Giving Access to Camera, Photos or Mic

Did you know that with instagram you can post photos, videos and even stories, without even having to give permission to the app. How is it done exactly? Well, you can do it from Instagram's mobile website. Follow these steps.

  • Open Instagram in your phone's browser.
  • Now, to upload a photo, tap + at the bottom > tap Photo Library or you can click a new photo > choose your photo, edit it as you would usually do > tap Next, write a caption, add your location and tag people. Once done, hit Share.
  • Similarly, if you want to post an IG story, from the home screen tap the camera icon up top > choose a photo or click a new one > edit it and once you're done, tap Add to your story to go ahead.
  • Next, to post a video in your story using an Android phone, open the video that you want to share in the Gallery. Tap the Share icon > tap Instagram Stories. There is no way to share videos to an Instagram story via an iPhone.
  • Lastly, to post a video to your Instagram feed using an Android phone, open the video > tap Share > tap Instagram Feed. From here on, edit your video > tap Next, add a caption > tap Share and that's it.
  • Similarly, if you have an iPhone, go to Photos and choose the video that you'd want to share in your Instagram feed. Open the Share Sheet and select Instagram. iPhone users only get the option to add a caption. Once done, hit OK to share the post.


5. Hide Your Online Status and Read Receipts

You must have noticed a green-dot icon that appears right next to the profile icon in DMs. This icon shows up whenever a user is online on Instagram. However, there's a feature that lets you hide your online status on Instagram. Follow these steps.

  • Open Instagram and go to Settings. Tap Privacy > tap Activity Status > turn off Show Activity Status.
  • This way no one will be able to know whether you're online on Instagram. On the downside, you also won't be able to see the activity status of your friends.
  • There's also a neat trick to hide read receipts. Whenever you receive a new message on Instagram, instead of opening the chat thread, turn on airplane mode on your phone. After airplane mode is on, go back to the chat thread and read the message. This way you'll be able to read the message without notifying the sender that you've seen their text.
  • Now, before turning off airplane mode, make sure you log out from Instagram. To do that, tap your profile icon > tap the hamburger icon > go to Settings. Scroll down and select log out.
  • After logging out, you can turn off Airplane mode, and with your phone now connected to the Internet, you can now log in to your Instagram account.
  • Now, when you'll go back to Direct, you'll see an unread badge right next to the sender whose message you just read a few moments ago. You can basically ignore this now, as you have already read the message contents.

6. Enable/ Disable Comments on Posts

Yes, you can disable comments on any of your Instagram posts. To know how to do it, follow these steps.

  • Open any of your Instagram posts and tap the three-dots icon in the top-right and tap Turn Off Commenting.
  • To turn off commenting even before you have shared a post, on the final page where you add caption and location, tap Advanced Settings. On the next page, enable Turn Off Commenting.
  • To enable commenting, choose your post, tap the three-dots icon in the top right and tap Turn on Commenting.

7. Make a Photo Collage in Your Instagram Story

To learn how to make a photo collage in Instagram stories without using any third-party app, follow these steps.

  • If you're using an iPhone, open Instagram and tap the Camera icon. Now, choose a photo that you'd want to post. Once this photo is loaded, minimise Instagram and go to the Photos app. Now open the second photo, hit the share icon and tap Copy photo.
  • Now go back to Instagram and you will see a pop-up on the bottom-left asking you to add this photo as a sticker. Tap it and that's all. Now resize and arrange it as you like. You can repeat this step as many times as you like to make your collage. Once done, share your story.
  • On the Android side of things, the process is a little longer, but it is possible. Here's how.
  • Download the Swiftkey keyboard from Google Play. Once the app is installed, give it all the permissions and set it up. After that, exit Swiftkey.
  • Now, go to Instagram Stories, and create a background for your collage. I will go for a black background.
  • Once done, tap in the middle so that the keyboard shows up. You then click the sticker icon from the top row of the keyboard, followed by clicking on the Pin icon in the bottom. Once you do that, you need to click the camera icon, then give permission to the app and that's all.
  • By doing this, you can now choose any photo as personalised stickers. Once you tap the photo, it appears on the screen, after which you can freely resize it or arrange it. You can repeat the steps and add as many photos as you'd like.

8. Decorate Your Feed With a Grid of Photos

To decorate your Instagram feed with a grid of photos you'll need a third-party app that can split your image into 9 parts. Follow these steps.

  • On Android, download Grid Maker For Instagram from Google Play. Once installed, open the app and choose the photo that you want to split into 9 parts.
  • Once the photo is selected, make sure 3x3 is selected. Now when you go ahead, you'll see your photo split and numbered into 9 parts. Simply tap in increasing order and keep posting on your IG feed.
  • Similarly, if you have an iPhone, you can download the app Grid Post - Grids Photo Crop, to split your photo into 9 parts.
  • Once the app is installed, fire it up, select 3x3 up top, and tap Photo Grids. Now tap Select Photos > choose your photo > tap Next. You have to keep on going until you see the edit screen. You can choose to edit the photo if you want or you can simply go ahead by tapping Done.
  • Now, similar to Android, simply tap on the photos in ascending order and post them all to your IG feed.

9. Turn On Two-Factor Authentication

Two-factor authentication lets you add an extra level of security to your account. With 2FA on, you'll always require an additional code whenever you login from an unfamiliar device. To turn in on, follow these steps.

  • Open Instagram on your phone and go to Settings. Tap Security > tap Two-Factor Authentication > tap Get Started.
  • On the next page, you can choose your security method. We will recommend choosing the Authentication app method. For this, you'll need to download any authenticator app such as Google Authenticator or Authy and set it up.
  • Now, go back to Instagram. From the Choose your security method page, enable Authentication app. On the next screen, tap Next. Doing this, you'll be redirected to the Google Authenticator app. Tap Okay to save the key for your account > tap Add Account.
  • Copy the code on screen and paste it on Instagram. Hit Next and tap Done.
  • Finally, on the next page, you'll get some recovery codes. Read the instructions carefully on-screen and store them safely. That's it.
  • So, with 2FA turned on, whenever you login from an unfamiliar device, you will always be asked to enter a code after entering your password, basically adding an extra level of security to Instagram.

10. Customise Your Bio with Special Fonts

Instagram has millions of users, but how do you stand out? One way is to use special fonts. Now, not only can you post visually appealing photos on Instagram, but you can also customise your personal details in a way that they look attractive to your profile visitors. Here's how to do it.

  • Go to your IG profile on a computer. We'd say computer because it just makes the process easier. You can also do this on a phone.
  • So, once you've opened your IG profile, hit Edit Profile and copy your name.
  • After this, open a new tab and visit igfonts.io.
  • Over here, paste the text that you just copied. By doing this, you'll now see the text in a variety of different fonts. Choose any > select and copy > go back to your Instagram profile and paste it.
  • Similarly, you can repeat the process for your bio as well.

11. Disappearing Texts

Instagram lets you send a disappearing photo or video to other users. To know how to do this, follow these steps.

  • Open Instagram > go to Direct > select a chat thread.
  • Tap the camera icon for sending a photo or video > tap the gallery icon in the bottom to open the saved photos in the gallery > select any photo, and once you do that you will see at the bottom that there are three options.
  • View once means the receiver will only be able to see this photo or video once. Allow Replay will let them play the photo for one more time. Lastly, Keep in Chat is the regular method of sending a photo that most of us usually follow.
  • So, once you hit View once, your photo will be sent to the receiver and they will only be able to see the post only once after they have opened it.

12. Make a Collection of Posts

Instagram is all about photos and videos, so why not save the photos and videos that we come across on Instagram and create a collection of sorts. For instance, you like a lot of photos of new cars on Instagram, so why not make a designated folder for it? Simply follow these steps.

  • Go to Instagram and tap the profile icon. Now, tap the hamburger icon at the top and select Saved.
  • Over here, make a list. For example, let's name it Phones.
  • Now, whenever you come across a good photo of any phone on Instagram, you can simply tap the Save icon. Doing that, you'll see a pop-up that says, Save to Collection. Doing that you can choose to save the phone photo in the Phones list that you created earlier.
  • Similarly, you can make as many lists as you want and start saving photos and ultimately making a collection of photos on Instagram.

Facebook Messenger Introduces Zoom-Like Screen Sharing Feature

Facebook Messenger has introduced a screen sharing feature for app users on Android and iOS. The same can also be accessed on the Web and Desktop via Messenger Rooms. 

Facebook Messenger Introduces Zoom-Like Screen Sharing Feature

Just like Zoom, people can instantly share their Mobile or Desktop screen and activities with their friends on Messenger. While app users can share their screens with up to eight people in a group video call, Messenger Room supports up to 16 people at once. Earlier this month, Facebook was reported to be working on plans to integrate its Messenger with WhatsApp, enabling communication between the two apps.

Rolling out on mobile platforms, the new screen sharing feature allows Facebook Messenger users to share their phone screens with family and friends. Through this, users can share a live view of whatever they are doing on their phones. Facebook says that the new feature “makes it easy to stay connected and close with your loved ones, even when you're physically apart.”

On the Messenger app, a group video call can support up to eight people at a time. On Messenger Rooms, up to 16 people can connect via mobile devices, on the Web, or on their desktop.

Facebook also announced plans to expand the number of people with whom you can share your screen to 50 people. The social media giant is also planning on adding some control features soon that would let the Rooms creators decide whether to limit the ability to share screen to themselves or allow all participants to do the same.

Earlier in July, Facebook was reportedly working on integrating the Messenger with WhatsApp. When this new feature rolls out, the two online chat apps will be able to communicate with each other. However, it isn't clear yet on how Facebook plans to maintain data encryption and user security when the integration takes off.

How to Enable Dark Theme on WhatsApp Web in Two Steps

WhatsApp Web dark mode is now officially supported and there is a super simple way to enable it. If you use WhatsApp Web that probably means you're using the service on a laptop or a desktop, or perhaps an iPad. On all of these devices WhatsApp Web dark mode could give some much needed relief to your eyes. We'd previously shared a simple way to enable dark mode on WhatsApp Web via the Inspect Element feature on most desktop browsers. Now that WhatsApp Web dark mode is officially supported, you no longer need to do that. If you want a dark theme on WhatsApp Web, keep reading this simple guide.

How to Enable Dark Theme on WhatsApp Web in Two Steps

WhatsApp Web Dark Mode: How to Enable


WhatsApp Web doesn't officially support dark mode, but there are two ways to enable it easily. You can either enable it by using the Inspect Element option on your browser or by installing an extension. Here's what you need to do.


  1. Go to WhatsApp Web on your computer and log in via the QR code. To do this, open WhatsApp on your Android phone > tap the three-dots icon on the top-right > Settings > WhatsApp Web. On iPhone, open WhatsApp > Settings > WhatsApp Web. Now scan the code on your computer's screen and log in. 
  2. Click the three-dots icon on at the top of the list of recent chats > Settings > Theme.
  3. Now select Dark and click Ok.
  4. That's it, now open WhatsApp Web and enjoy dark mode.

How To Create Your Own Avatar and Share on Facebook

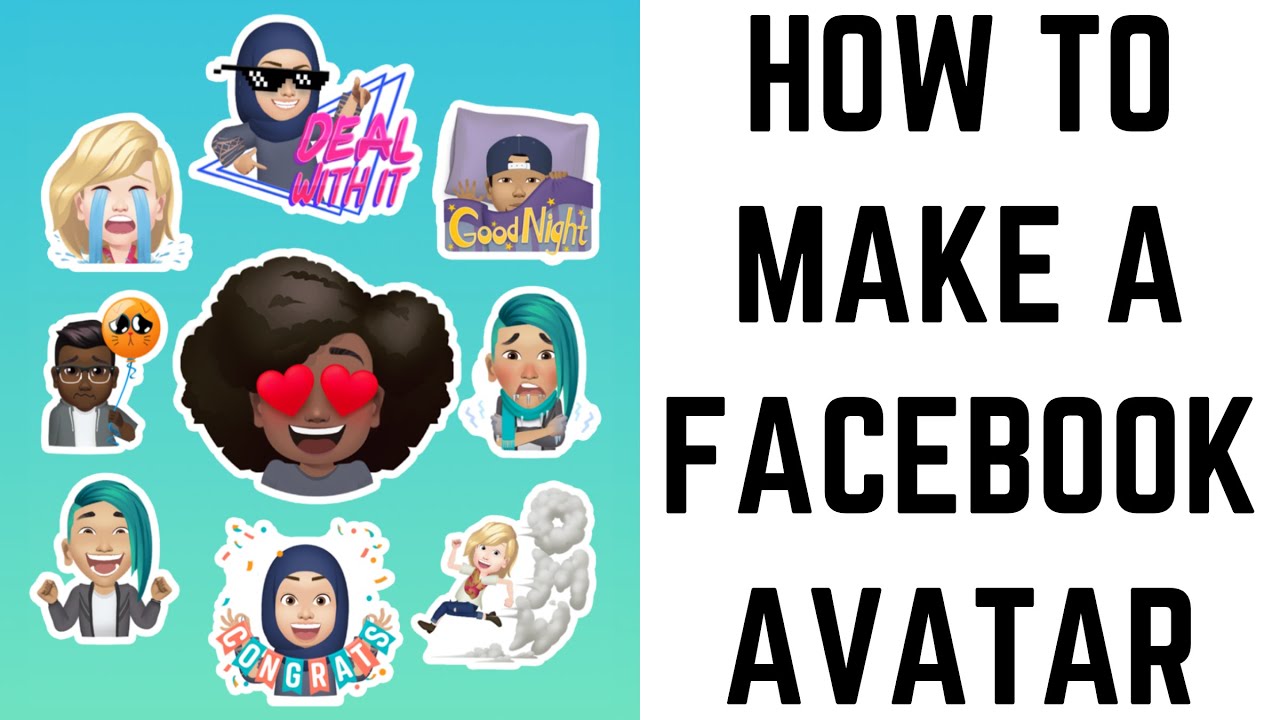
Haven't you created a Facebook Avatar yet? Well, you are missing out on a lot of stuff. The latest feature rolled out by the social networking giant is the newest addiction among users. It lets you create an avatar, which is a cartoony depiction of yourself. What's interesting is that you can customize the same with a variety of hairstyles, faces, and outfits. This is almost similar to Apple's Memoji and Bitmoji avatars.

How to Make a Facebook Avatar

 You can use the same across Facebook as your profile picture, comments or stories and in Messenger chats. Also, the Facebook avatar will be available as a sticker in apps such as Twitter, Snapchat, Instagram, and Mail.

 How To Create Facebook Avatar

Follow the simple steps to create your Facebook Avatar.

Step 1: Open the Facebook app on your smartphone and tap menu button at the top right corner on Android and at the bottom right corner on iOS. 

Step 2: Tap See More and choose Avatars. 

Step 3: Tap Next and choose Get Started. 

Step 4: Choose your preferred skin tone from the 27 options that are available and tap Next.
 
Step 5: Now, you will be asked to select a hairstyle for the avatar from options such as short, medium or long and a Color. 

Step 6: The customization is the Face, wherein you will be asked to choose a face shape, face lines and complexion. Then, customize your eye shape, color and eyelash length. Later, move on to the Eyebrows shape and color. It is also possible to add glasses. After the Eye icon, head on to customize the nose and mouth by choosing the desired shape, lip color and facial hair. 


Step 7: After the face, choose a body shape, an outfit that suits you the best, and add accessories such as hat, car ears, or scarf.   

Step 8: Once you are done with the customization, you can tap on Next and Done.

How To Use Facebook Avatar?

To use the Facebook Avatar you have created, you just have to tap the smiley face icon as you do to access emojis in the 'Write a Comment' section on Facebook. Doing so, you will get the avatar you created that can be used in conversations.

How to Create TikTok-Style Videos In Instagram Reels

Missing TikTok? Instagram Reels is here to keep you entertained and to help you unleash your creativity via short videos. Now that TikTok has been banned, Instagram Reels has the opportunity to become its most popular replacement. We've already seen apps made by Indian developers, such as Mitron and Chingari, attempt to capture the TikTok audience and now the big guns are stepping in. Instagram is owned by Facebook and it already has millions of users in India. With Reels, it could be the most serious challenger to TikTok.


How to Create TikTok-Style Videos In Instagram Reels


How to create Instagram Reels

Creating Instagram Reels is quite simple but the most important step is to get Reels on your Instagram account. Facebook is still rolling out Reels to people in India. 

Creating Reels is quite simple by following these simple steps.


  1. Open Instagram.
  2. Tap the camera icon on the top-left.
  3. At the bottom you'll see options such as Live, Story, and Reels. Tap Reels.
  4. Now you can start creating Reels on Instagram. The maximum length of any video clip is 15 seconds at the moment. We'll walk you through all the options in the next few steps.
  5. To record Instagram Reels, tap the big white circle icon. The same button lets you stop recording too.
  6. Before you start recording you can add a few effects via icons on the left side. To adjust video recording speed the right arrow icon which looks like the play button. You can record videos in slow motion at up to 0.3x or speed them up to 3x.
  7. To add effects to your videos, tap the smiley button and swipe right on the big white circle. This will show you all available effects and you can pick what you like. The effect icon shows up inside the big white circle and you can tap it to start recording.
  8. Instagram Reels also allows you to set a three-second timer before recording any clip. Tap the timer icon on the left and set the duration for your clip (0.1 to 15 seconds) and tap Set Timer. When you start recording, you will see a three-second timer on screen before the video begins
  9. Finally, you can also add music to it by tapping the music icon on the left. The best part here is that you can see the lyrics on screen and choose any part of the song that you want to use. TikTok allowed you only a specific 30-second clip for each song, but on Instagram Reels you have the freedom to pick your favourite parts of any track. You can add music before recording a video to create lip-sync videos, or you can add it after recording to give it a cool soundtrack.
You may also like..