How to Download Instagram Reels Video and Save on Your Phone

It's a new day and no, the ban on TikTok has not been lifted. Instead, Facebook-owned Instagram has launched a new feature dubbed Reels, which is basically a clone for making TikTok-style short videos. TikTok made it really easy to download and share videos, but Instagram Reels does not. In this article, we will tell how you can download Instagram Reels on Android or iPhone.

How to Download Instagram Reels Video and Save on Your Phone

Instagram Reels: How to save

Here's how you can save Instagram Reels within the app, follow these steps.

  1. Open Instagram > tap search > open the Reels video that you'd like to download.
  2. Alternatively, you can also visit a user's profile > hit the new Reels tab, which you'll notice now sits next to the IGTV tab > select the Reels video that you'd like to download and open it.
  3. Once the video is loaded, hit the three-dots icon > tap Save.
  4. To access the saved Reels video, go back to Instagram's homescreen > tap your profile icon > tap the hamburger icon > tap Settings > go to Account > go to Saved.
  5. You'll find your recently saved videos inside the All Posts folder.

Instagram Reels: How to download on Android

The second method is for people who use an Android phone and want to store these short videos locally on their device. Here's how to do it.

  1. Go to Google Play and download Video Downloader for Instagram - Repost Instagram.
  2. Once the app is installed, open it and set it up.
  3. After the app is set up, go back to Instagram and select the Reels video that you'd like to download and open it.
  4. Now hit the three-dots icon and tap Copy Link.
  5. Open the recently downloaded Video Downloader for Instagram app and the URL that you just now copied will automatically be pasted there.
  6. Now go to your phone's gallery and you'll find the Reels video. You can then edit or even share it with others via third-party apps.

Instagram Reels: How to download on iPhone

Next, there's an app that lets you store Instagram Reels if you're using an iPhone. Follow these steps.

  1. Go to the App Store and download InSaver for Instagram.
  2. Once the app is installed, open it and set it up.
  3. After the app is set up, go back to Instagram and select the Reels video that you'd like to download and open it.
  4. Now hit the three-dots icon and tap Copy Link.
  5. Open the recently downloaded InSaver for Instagram app and the link that you copied will automatically be pasted.
  6. Tap Watch It! > tap Options > tap Share > tap Save Video to save the short video to the Photos app.

Instagram Reels: How to download via screen recording

Finally, the last method we are suggesting lets you store Instagram Reels via screen recording. You can use this method if you don't want to download a third-party app on your device. Follow these steps.

  1. On iPhone make sure screen recording is added to the Control Centre. Go to Settings > Control Centre > Customise Controls. Now add Screen recording.
  2. On Instagram, open the Reels video that you'd like to download.
  3. Now swipe upwards from the bottom of the screen to reveal the Control Centre. Tap Start Recording to start recording the video, Go to Instagram and play the video. Once done, stop the screen recording by tapping the red bar at the top > Stop. The video will automatically be saved in the Photos app.
  4. If you're using an Android phone, you can either use the built-in screen recorder (if your phone has it) or a third-party app for screen recording.
  5. If your phone does not have a screen recorder, go to Google Play and install Mobizen Screen Recorder. Once installed, open the app and set it up.
  6. After that, simply go back to Instagram > play the video that you wish to download > hit the floating screen recorder icon and tap the camera button to start the screen recording.
  7. Once done, tap the stop button to stop the recording. Your screen recorded video will automatically be saved in your phone's gallery.

These are some of the best methods that let you store Instagram Reels on your Android phone or iPhone. If you know about any other method that you'd like to suggest to us, you can write it in the comments.

TikTok's New Rival TakaTak Launched By MX Player

The Indian government banned 59 Chinese apps earlier this month, including the popular short video-sharing app TikTok. The demand for local apps has skyrocketed ever since. One after another competitive apps are coming to the market after TikTok was banned in India. Now, MX Player has launched an app similar to TikTok in India called 'TakaTak'.

TikTok's New Rival TakaTak Launched By MX Player
 

The app is now available in the google play store and the Android users can go to the Play Store and download the app. It is expected to be available in the Apple Store soon. The latest app is running on version 1.0.1 and the company claimed the app received 50,000+ downloads in a very short time. The app has received a whopping 4.3 rating on the Play Store so far. 


Users may not get the same benefits as TikTok in this app. Because the Chinese platform made it much easier for users to entertain as well as earn money. The downloads can happen quickly, but you need to be very careful before using apps now. You need to know if your shared data is secure. There are a number of TikTok rival apps like Chingari, Mitron, Roposo, and their download has also increased a lot. On the other hand, the Chingari app is rated 4.7 out of 5 on Google Play Store, and the app is available in the Google Store as well as the Apple Store. The company also claimed that the app has surpassed 25 lakh downloads from about 6 lakh downloads in ten days. TikTok's rival, the Mitron app also has been reached more than 1 crore downloads on Google Play Store. Due to the non-availability of TikTok on Play Store and Apple's App Store, there is no certainty as to whether the app will be re-launched in the country in future. 

Redmi Laptop May Be Released In India Soon. Price tipped to be under 20K

Redmi branded laptops expected to be launched in India soon with price tipped to be under 20K!. Report mentions that there will be three possible launch Windows.


Chinese smartphone manufacturer Xiaomi recently launched the Mi Notebook laptops in India, marking its entry into the laptop segment of the country. However, while the Mi Notebooks aren’t anywhere near the affordable price-range, looks like Xiaomi is planning to bring budget laptops under Redmi branding in India soon.

Redmi Laptop May Be Released In India Soon. Price tipped to be under 20K

A TechPP report claims that Xiaomi could launch affordable RedmiBooks in India that could start at less than Rs 20,000 mark and go as high as Rs 33,000— beyond which is the Mi Notebook territory. Xiaomi is planning to market this for students and budget consumers. Notably, the company is yet to confirm so take the report with a pinch of salt.

According to the report, Redmi laptops with Intel Core i3 processor could start below Rs 25,000 whereas the other RedmiBooks with lower chips could start below Rs 20,000 price point. Reportedly, there could be Redmi laptops with older generation Core i5 chips. While these processors are underpowered when compared to the new Intel chips, these will keep the cost low and might be enough to get the job done for the targeted budget consumers.


Furthermore, the report says that the Redmi laptops will be manufactured in India and will be different from their Chinese counterparts. These will have various coloured chassis and have more plastic parts to keep the prices low. Also, the report says that these will not be Chromebooks but likely to run on Windows 10 (Home) operating system.

The Redmi-branded laptops could launch in India in the coming months. The report mentions three possible launch windows— the first one is in mid-July, the second one is between late July and early August, and the last one is close to India’s Independence Day on August 15.

Xiaomi has not mentioned anything regarding the arrival of budget laptops in India, but the idea doesn’t look far fetched. Also, if the company brings laptops targeted at budget customers, it makes sense for it to launch them under well-known budget Redmi branding. If and when Xiaomi decides to launch the RedmiBooks in India, it will have a presence in two ranges of laptops in India— premium and affordable.

How to Reduce PDF File Size for Free on Computer, Phone

Many government websites have this PDF file size restriction, that doesn't allow you to upload a PDF with a file size more than a certain limit. That leaves a person with only one option, i.e. to compress the PDF and reduce its file size; but how do you do that? In this guide, we take a look at some of the best methods that let you compress PDF files. The best part is that these methods are absolutely free and are supported on all major operating systems. Keep reading as we tell you how to compress PDF files on your computer and phone.

How to Reduce PDF File Size for Free on Computer, Phone

Compress PDF online

The first method allows you to compress PDF online. It is supported on Windows 10, macOS, Android and iOS. Follow these steps to get started.

  1. Visit ilovepdf.com and hit Compress PDF.
  2. On the next page, tap Select PDF file > make your choice > tap Choose.
  3. After this, choose the compression level according to your preference and tap Compress PDF.
  4. On the next page, tap Download compressed PDF to save the file on your device.

Compress PDF on Mac

If you own a Mac, you don't even need an online website or any third-party app to compress PDF files. Instead, Mac users can natively compress PDFs offline. Follow these steps.

  1. Open the PDF file that you'd want to convert in Preview.
  2. Once the file is loaded, click on File > click on Export.
  3. Change the Quartz Filter from None to Reduce File Size.
  4. Hit Save to go ahead and store the compressed PDF file on your system.

Compress PDF on Windows 10

There are several third-party apps that let you compress PDF files offline, however, one of the best ones that we came across is called 4dots Free PDF Compress. Go ahead and follow these steps.
  1. Download 4dots Free PDF Compress and install it on your Windows 10 computer.
  2. Open the app and click Add File to add the PDF that you want to compress. Locate and select the PDF > click Open.
  3. Choose how much you'd want to compress the image quality.
  4. Once done, hit Compress and you're done. Your compressed PDF file will then be saved locally on your Windows 10 computer.

How to Prevent Eye Strain When Using a Computer

Now a days most of the people are working from home due to lock downs due Cooronavirus outbreak, it becomes even more important to prevent eye strain. Commercial office spaces tend to have better furniture and lighting than your makeshift work-from-home setup and that can contribute significantly to increasing eye strain. However, there are lots of easy ways to prevent eye strain and we're going to tell you how to reduce this.

20-20-20 rule: How to prevent eye strain

Improve your posture

The way you are sitting could be the reason behind your tired eyes, according to the American Occupational Safety and Health Association. Before looking for software or hardware solutions to your problem, check if your posture is correct. In many cases, the display is either above or below eye level, which leads to incorrect posture.

If you're craning your neck or slouching to look at the screen, you're straining your eyes. Try using a laptop stand or even just a pile of books to raise the screen to eye level. If the screen is above eye level, try raising your chair to bring the screen to eye level. Once you've done this, try some apps that will further help you reduce eye strain.

The 20-20-20 rule

The 20-20-20 rule is quite effective at reducing eye strain. Simply put, after every 20 minutes of looking at the screen, look at an object that is at least 20 feet away for 20 seconds. 

Keeping track of those twenty minute breaks isn't easy though, particularly when you're in the middle of work, so we suggest you try a free Web app called Protect Your Vision. Here's how to use it.

  1. Open the Protect Your Vision website > click 20-20-20 > select your break schedule from the drop-down menu. You may go with 20-20-20 (recommended) or 60-5 (five-minute break every hour) or Custom (where you can choose the duration of each break and the interval between breaks).
  2. Once your break schedule is selected, click the black button labelled "Request permission and test notification" > Allow (Chrome) or Show for this session (Firefox) > Start PYV. The website requires desktop notifications because that's how it reminds you to take a break. Desktop notifications are supported on Firefox, Chrome and Safari.
  3. Now a timer will appear, showing you the time till your next break. You may disable sound notifications by clicking the volume icon next to the timer. Once you see a notification, click it and then click Start break. Now your screen will turn dark for the duration of the break. You should look at a point at least 20 feet away. Alternatively, you may click Start Eyes Gymnastics on your screen and the app shows you some eye exercises (move eyes up and down, etc.) that you can quickly go through to reduce eye strain.


Protect Your Vision is a nice app but if you want something that automatically darkens your screen every 20 minutes, then try FadeTop on Windows or TimeOut on Mac. They accomplish the same result, and don't require you to click on any button to start the break.

Cut Out The Blue Light

According to the Vision Council, one of the largest groups of manufacturers and suppliers in the optical industry, blue light is one of the causes of digital eyestrain. To make your monitor eye-friendly, you can go into the settings and tweak the various options to reduce eye strain.

The first thing you should do is set the brightness and contrast to a comfortable level. If your workplace doesn't have plenty of natural light, then you might want to cut out the blue light on your display to give your eyes some much-needed relief. You can do this manually by changing your display settings, but that isn't for everyone.

The next step is to cut out the blue light from the display to reduce eye strain. This is most effective when you are working under artificial light, and not that useful for those who work during the day in rooms with lots of natural light.

Reduce blue light on Android

  1. On stock Android, you can go to Settings > Display.
  2. Now tap Night Light.
  3. This is where you can set how long you want the smartphone's display to cut out blue light and adjust colour temperature if needed.
  4. Note that this feature may not be available with the same name on various custom versions of Android, where it may be called Night Mode, Reading Mode, Night Shield, Eye Care, etc. Be sure to check your phone's display settings thoroughly to find this option.

Reduce blue light on iOS

  1. On iOS you can go to Settings > Display & Brightness.
  2. Now tap Night Shift.
  3. Here you can schedule it according to your preference and adjust the colour temperature too.

Reduce blue light on macOS

  1. On macOS, click the Apple logo on the top-left of the screen (it's on the top bar).
  2. Now click Display.
  3. Click the Night Shift tab and select the duration you want to cut out the blue light for. We've set this to the entire day, but you can set it according to your preference. You also get an option to select how warm or cool you want the colour temperature to be.

Reduce blue light on Windows

  1. On Windows 10, open the Start Menu.
  2. Click the gear icon on the left side.
  3. Click System and then Display.
  4. Now enable Night Light. Here you can adjust the schedule and colour temperature.
  5. If your version of Windows does not have this feature, you can get the job done by downloading an app such as Flux.

work from home unsplash Work From Home

Hardware
While the solutions mentioned above should be good enough for most situations, you might want to consider buying gadgets with anti-glare screens to reduce the strain on your eyes. If you haven't done this, you can buy yourself an anti-glare screen coating. We tested an anti-glare filter from 3M on our laptops and found it to be quite effective.

If you are using a device with a reflective screen, you may find it hard to see your screen if it is facing the light. Anti-glare filters are useful in these situations and the one from 3M does the job as advertised. It takes some time to attach to your screen but that's a one-time hassle. Good quality anti-glare coatings cost anywhere between Rs. 1,000 and Rs. 2,000.

If that isn't an option, we suggest you visit an ophthalmologist and get yourself a good pair of anti-glare glasses. Some brands (like Gunnar) also make glasses that are supposed to be particularly helpful for "computer vision syndrome."  

These tips should have helped you reduce eye strain.

Source: Gadgets 360

How to Remove Password From PDF on Google Chrome, Android, iPhone, Windows, and Mac

If you've ever got a bank statement or a phone bill as a PDF file, you know that most of these are password protected. This is because these PDF files contain private and sensitive information that needs password protection. Remembering every single PDF password is a big hassle, particularly if you just want to save these documents to send to your CA to file tax returns. To save them the trouble you can easily remove password from PDF files. Now you should note that removing password from PDF files requires you to know the password first.

How to Remove Password From PDF on Google Chrome, Android, iPhone, Windows, and Mac

Before we go ahead and tell you the methods for removing the password from a PDF file, we would like to point out that these methods are just meant to help you access PDF files in a much more convenient manner. You can only remove password from PDF file if you already know the password. With that said, follow this guide as we tell you how to remove password from PDF.

How to remove password from PDF in Android

Practically speaking, many of us mostly access PDF files on our computers, but that's not necessarily the case every time. Sometime you might just have your smartphone handy and you'll need to access PDF files on the go. In that case, it could turn out to quite irritating if you have to enter the PDF password again and again. Good news is that there's a way to get rid of that as well. If you're using an Android smartphone, follow these steps to remove password from PDF.

  1. Download and install PDF Utilities from Google Play.
  2. Make sure that you've already downloaded the PDF file of which you want to remove the password.
  3. Open the PDF Utilities app and tap Select next to Select PDF.
  4. Once you've located your file, select it and tap Start. You'll get a pop-up asking you enter the PDF password. Enter it and tap OK.
  5. That's it, just go back to the same destination where the original PDF file is saved to access the new PDF file without password protection.

How to remove password from PDF in iPhone


You can remove password from PDF on iOS. This requires an app called PDF Expert, which is a free download but the password removal feature is a part of a paid subscription. Thankfully there's a free trial for one week, so you can get the job done with that easily. The PDF Expert Pro subscription costs Rs. 4,099 per year, but if you can remove passwords from all your PDF files within a week, you can cancel the subscription without paying (open the App Store > tap your profile picture > Subscriptions > select PDF Expert and then Cancel). If you're fine with that, go ahead and follow these steps.

  1. Download and install PDF Expert on your iPhone. From the main menu, open the Files folder and locate the PDF file you want to remove the password from.
  2. Tap on the file to open it > enter the password to unlock the document > tap on the three-dots icon present in the top-right corner > select Change Password and tap Remove Password.
  3. This will disable the password-protection on the PDF file and the next time you try to open it, you won't require to enter the password.
    If you had bought PDF Expert before the app moved to a subscription model, you will be able to access this feature for free.


How to remove password from PDF via Google Chrome


By far this is the easiest method for removing a password from a PDF file. For this to work, all you need is either a PC or a Mac with the Google Chrome browser installed and you're good to go. Just follow these steps:

  1. Open your PDF file on Google Chrome. Doesn't matter where your PDF file is stored — be it in your Gmail, Drive or any other third-party non-Google service such as Dropbox, OneDrive etc., just open it in Chrome.
  2. When you open the document for the first time, you'll have to unlock it by entering the password.
  3. After entering the password, your PDF file will be unlocked. Now, give the print command on your computer. For Mac users this will be, Command + P; for Windows users this will be, Ctrl + P. Alternatively, you can also click on the Print button which is present in the top-right corner.
  4. Next, set the Destination as Save as PDF and click on Save.
  5. This will locally save the PDF file on your computer, and you'll now be able to access without the need to enter the password.
  6. This method works with other browsers such as Safari, Firefox, Opera, among others.

How to remove password from PDF on Mac


If you have a Mac and don't want to use a browser to remove password from PDF, you can try an alternative. Follow these steps:

  1. Download the PDF file on your Mac.
  2. Go to Finder > locate your file and double-click it to open it in Preview.
  3. Enter the password to unlock the PDF document.
  4. Once your PDF file is unlocked, click on File > Export as PDF > enter the file name and set its destination > hit Save.
  5. That's all, the new PDF file you just saved will no longer require a password.

How to remove password from PDF in Adobe Acrobat DC


If you want to remove password from PDF on Windows 10 or Mac, you can use Google Chrome to do it. In case you want to do this via Adobe Acrobat DC, you'll have to purchase the full version of Adobe Acrobat DC. The service will cost you Rs. 1,014 per month if you commit to an annual contract or if you want to use it for a month or two, you can pay Rs. 1,691 per month. Once that's done, follow these steps:

  1. Open the PDF file in Adobe Acrobat Pro DC and enter the password to unlock the file.
  2. After the file is open, click on the Lock icon on the left and under Security Settings, click on Permission Details.
  3. Once you do that, click on Security > set Security Method to No Security and click OK to remove the password.
  4. Next, click File > Save and from the next time you open this PDF file, you won't be asked to enter a password.

By following these simple steps you will be able to remove password from PDF files.

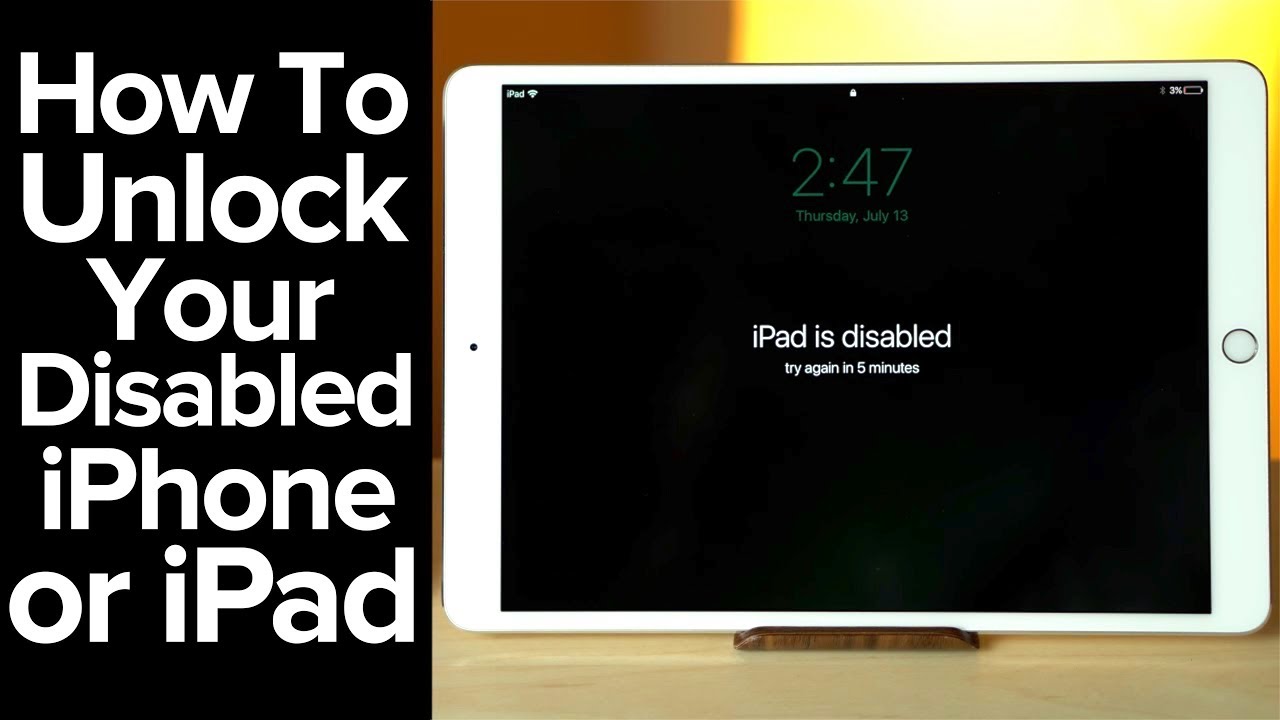
How to Restore a Disabled iPhone or iPad

It's common that we tend to forget our iPhone/iPad passcode and leads to temporary disabling of iPhone/iPad. Don't worry about it.. It's just a temporary issue and can be solved easily. In this article, am providing the steps to enable the disabled iPhone or iPad.

How to unlock a Disabled iPhone or iPad

Why is my iPhone or iPad is disabled ?

Before started with the steps, let's talk about why iPhone or iPad gets disabled. When you enter the wrong passcode on your iPhone multiple times, it gets disabled and you will have to wait for some time before you can attempt to enter the passcode again. For the first five wrong passcode entries, you'll only get prompted by a notification saying that the passcode is wrong. If you enter the wrong passcode for the sixth time, your iPhone will get disabled for 1 minute. After the seventh wrong attempt, your iPhone will now be disabled for 5 minutes. The eighth attempt disables your iPhone for 15 minutes, the ninth one disables it for one hour, and the tenth one permanently disables the device. Entering the wrong passcode for 10 times can even erase all your data if you have enabled that setting in iOS.


After 10 wrong passcode attempts, your only option is to restore the iPhone to factory settings. This means that all your personal data, photos, videos etc. will be lost, which is a good time to remind you to backup your iOS device regularly via iCloud or your computer.

icloud backup ios icloud

How to restore disabled iPhone without iTunes

If your iPhone is disabled and you want to restore it without iTunes, here are your best options.

  1. If your iPhone is not permanently disabled, you can enter the correct passcode and the iPhone will work just fine.
  2. If you forgot your passcode, you can follow the steps below to restore your iPhone to factory settings. This will wipe all your data. You can then restore your iPhone's data from a backup via iCloud or iTunes. This is the best way to restore disabled iPhone without iTunes.

How to restore disabled iPhone SE, iPhone 6S, iPhone 6S Plus, or older iOS devices

  1. Press and hold power button until the power-off slider appears. Drag the slider to turn off your iPhone.
  2. While pressing and holding to the home button, connect your iPhone to the computer. Keep holding the button until you see the recovery mode screen.
  3. On your computer, you will have to locate your iOS device on iTunes (Windows or older macOS versions) or if you have macOS Catalina, Finder. Open the correct app and then click on the iOS device you have connected. Now click Restore.
  4. On the next screen, you'll get a prompt asking if you want to restore your iPhone to its factory settings. Continue by clicking on Restore and Update.
  5. Next, follow the on-screen prompts and following that Finder will automatically download the new software for your iPhone. Wait for the process to finish, and once that is done, set up your device as new.


How to restore disabled iPhone 7 and 7 Plus

  1. Press and hold power button until the power-off slider appears. Drag the slider to turn off your iPhone.
  2. Next, connect your device to the computer while holding the volume down button. Keep holding the volume down button until you see the recovery mode screen.
  3. Now follow step 3 onwards as mentioned above.

How to restore disabled iPhone 8, iPhone X, and newer iOS devices

  1. Press and hold power button and either volume button until the power-off slider appears. Drag the slider to turn off your iPhone.
  2. Next, connect your device to your computer while holding the power button. Keep holding the power button until you see the recovery mode screen.
  3. Now follow step 3 onwards as mentioned for restoring iPhone SE, 6S, and older iOS devices.

How to Send Message to Unsaved Number Without Adding Contact In WhatsApp

WhatsApp is one of the most popular messaging apps in the world and while it's really easy to use, there's one annoyance that has frustrated us for a very long time. How to send message without number in WhatsApp, or how to send WhatsApp message without adding contact. As basic as it sounds, there's no official workaround to send WhatsApp messages to unsaved numbers.

How to Send Message to Unsaved Number Without Adding Contact In WhatsApp

This is an important feature because lots of WhatsApp privacy settings are restricted to “My Contacts” and you may not want every random person saved in your phone book to be able to see your profile picture, for example. That's why we are going to tell you how to send WhatsApp messages without adding contact.

There are some third-party apps out there that let you send messages on WhatsApp without adding contact but using these apps is not recommended as it can compromise your security, and may even get your WhatsApp account banned. So, it is always better to stay away from such apps and not put your smartphone's security at risk. 

Here are the steps to send messages to Unsaved Number Without Adding Contact.


  1. Download Siri Shortcuts app first.
  2. Launch the app, tap the Gallery tab which is on the bottom right. Now add any shortcut you like, and run it once. Note: You only need to follow step 1 and 2 if you have never used Siri Shortcuts before.
  3. Next, go to Settings > Shortcuts > enable Allow Untrusted Shortcuts. This will allow you to run Siri Shortcuts from anyone, so be sure to download shortcuts made by people you trust and even if you download random shortcuts, inspect the steps involved to be sure it does what you expect.
  4. After that is done, open this link on your iPhone and click the Get Shortcut button to download it.
  5. Now you'll be redirected to the Shortcuts app. Tap Add Untrusted Shortcut.
  6. Following this, you can open the Shortcuts app and look for the WhatsApp to Non Contact shortcut in the My Shortcuts tab. You can either run it from here or tap the three dots icon at the top of the shortcut > then tap Add to Home Screen to create a quick launch shortcut on the home screen.
  7. Once you run this, you will be asked to enter the recipient's number. Enter it along with the country code and you'll be redirected to WhatsApp with a new message window open.

Difference between driver.get() and driver.navigate().to() methods!

First step in any automation Test script is to launch the browser and navigate to the Application Under Test. When it comes to Selenium, there are 2 methods.

            1. driver.get("URL")
            2. driver.navigate().to("URL")

Difference between driver.get() and driver.navigate().to() methods


Some of the Automation Testers are confused with these 2 statements. This post details the difference between these 2 methods.

Method#01: driver.get()

This method navigates to the specific URL and wait until the page is completely loaded. This method makes the WebDriver wait until the page is completely loaded and then returns control to your script. The main reason for using this method is that the modern days Websites are heavily using AJAX and we are not sure how long it'll take the page to completely load.

Return Type of this method is "void"


Method#02: driver.navigate().to()

This method just navigates to the application URL and it'll not wait until the page is loaded. This method is not recommended for modern days application as they are heavily depending on AJAX/ API Calls.

But, this method maintains the navigation history in Cookies and can be used whenever needed.

Return Type Method is "Navigation" where "Navigation" is an interface. This Navigation interface maintains History of the browser actions your performed post the execution of this method.

Examples:

driver.navigate().forward()
driver.navigate().back()
driver.navigate().refresh()

Syntax: driver.navigate().to("http://software-testing-community.blogspot.com/")

How to Download All Your Videos from Tik Tok App

TikTok along with other 58 apps're banned by the Government Of India and at the time of writing, Tiktok is also no longer available on app stores like Google PlayStore, Apple's App Store in India. The app is still accessible for people who have it installed but this could also change. In case you're worried about losing all the videos you uploaded, there are some steps you can take to download all your data.

Before TikTok becomes inaccessible, we would like to help you to recover all the data from your profile. Keep reading as we tell how you can download all your TikTok data at once.

How to download Tiktok video without watermark - Quora


How to download TikTok data

There are 2 methods that we'd be suggesting in this article. The first method is the manual one, with which you need to download each and every video manually. The second method that we'll suggest is to request your data directly from TikTok

  1. Launch TikTok App and login and go to your profile.
  2. Now, open a Video > tap on the ellipses(i.e.,three-dots icon) > tap on Save Video.
  3. Particular TikTok video will be locally downloaded on your device.
  4. You can repeat the same steps to download the other videos as well. Kindly note, that this is the fastest manual method available at the moment. Also, keep in mind, the videos that are downloaded will have a watermark. 


.Request Data

The second method lets you request for your data from TikTok directly. Once the request is processed, you can then download all your data at once from within the app. Go ahead and follow these steps

  1. Launch TikTok App and login and tap the ellipses(i.e.,three-dots icon) in the top-right corner.
  2. Tap Privacy and safety > tap Personalization and data > tap Download your data.
  3. On the next screen, you need to tap Request data file. Hitting this button sends a request to TikTok for downloading your data. Note, it can take up to 30 days for your request to get processed.
  4. Moving forward, you need to manually keep checking the app if your Download is ready. Once it is, you need to go to the Download data tab, present right next to the Request data tab. Over there, you need to tap the Download button right next to your requested data.
  5. Keep in mind, the requested data file will be available to download for up to four days, and if you don't download within the given timeframe, the data file will be expired.

How to Make Group Calls With WhatsApp on Android, iPhone

WhatsApp is one of the most popular mobile app for letting people connect with their loved ones. But the instant messaging app isn't limited to just text messages, and offers a way to connect you with a group of people either over voice or video. This is useful if you want to speak with multiple contacts at once — may be to discuss something important or just to know their well-being. Group calling on WhatsApp is available across platforms. So no matter whether you have an Android device or an iPhone, you can make group calls. Also, the chat app supports cross-platform group calls, which means you can speak with your friends regardless of the platform they are using.


How to Make Group Calls With WhatsApp on Android, iPhone


Introduced in July 2018, group calling on WhatsApp is an important and useful feature for a large number of people who don't want to understand how other group calling apps like Zoom or Google Duo can be used to make group calls. The ease that the Facebook-owned company offers through its group calling feature is indeed what has attracted various users. You can add a new participant to an existing group call or start a call with multiple members directly from your one of your group chats.

All this shows how group calling is an integral part of WhatsApp. But how can you make a group call? Here's our step-by-step guide on how to make a group call with WhatsApp. This guide provides you with steps for Android and iPhone. We've also distinguished parts to let you understand how you can make a group voice call and group video call with your contacts using WhatsApp. So, let's get started.

Before beginning with the steps, it's important to note that WhatsApp allows group calling with up to four participants at once. This means that you can't make a group call with more than three of your contacts on WhatsApp on any platform.

How to make group calls on WhatsApp for Android


  1. Open WhatsApp on your phone.
  2. Tap the Calls tab from the bar that includes tabs for Chats and Status.
  3. Now, hit the call button from the bottom-right corner of the screen.
  4. You'll get a list of contacts with whom you can connect through a WhatsApp call.
  5. Tap the New group call button.
  6. The app will now let you select your contacts from the list with whom you want to speak through a group call. Remember that you can add only three of your contacts for a group call.
  7. Now, you'll see circles of the contacts that you've selected for your group on top of the list.
  8. You can then choose between a video and voice call by tapping the phone and video camera button, respectively.

At any time during the call, you can also add new participants — as long as this is within the limit of four participants — by tapping the contacts icon from the top-right corner of the screen.

How to make group calls on WhatsApp for iPhone


  1. Open WhatsApp on your iPhone.
  2. Tap the Calls section from the bottom bar that includes Status, Calls, Camera, and Chats sections.
  3. Now, press the call button from the top-right corner of the screen.
  4. A list will pop-up on your screen that will include all your WhatsApp contacts.
  5. You'll now need to press the New Group Call button that's available just above your WhatsApp contacts list.
  6. The app will now provide you with the list from where you can select participants for your group call. Just like Android, you can add only up to three of your contacts for a group call.
  7. Once you've selected participants for your group call, you can either make a voice call by tapping the phone button or a video call by tapping the video camera button.

You can, of course, add any additional participants to your group call — until the list reaches four participants — by tapping the contacts icon from the top-right corner of the screen.

How to make a group call on WhatsApp for Android and iPhone from within the group


  1. Open WhatsApp on your phone.
  2. Select a group from where you want to make a group call.
  3. Now, tap the call button from the top-right corner of the screen.
  4. A pop-up screen will slide up from the bottom from where you can select the contacts with whom you want to speak on the group call. You can pick up to three participants at once.
  5. After that, you can select either the video camera button to make a group video call or the phone button to make a group audio call.
WhatsApp also recently brought an update for the groups that have four or less members. That update made it easier for users to make group calls as it allowed a group audio call simply by tapping the phone button or a group video call by hitting the video camera button — just like how you can make an audio or video call to an individual on WhatsApp.